Jobs
Deploying models and pipelines in Cordatus is a seamless and rapid process, requiring just a few clicks. Each deployment is treated as a distinct Job instance. Inference analytics and alarms are tracked and stored independently for each job, ensuring precise monitoring and analysis.
Cordatus utilizes the NVIDIA DeepStream SDK (DS) for Intelligent Video Analytics. It's essential to acknowledge that the DeepStream version may vary among devices, resulting in slight differences in Cordatus' capabilities. For detailed information on the DeepStream version installed on your specific device, please refer to the tables provided below. Additionally, users can explore the NVIDIA DeepStream SDK page to gain insights into the functionalities associated with their particular DeepStream version. This approach ensures a tailored and optimized experience for users across various hardware configurations.
For Workstations:
| GPU Driver Version | ADA Architecture | Other Architectures |
|---|---|---|
| 525.125.06 – Latest | DS 6.3 | DS 6.3 |
| 510.47.03 – 525.125.06 | ❌ | DS 6.1 |
| 470.63.01 – 510.47.03 | ❌ | DS 6.0 |
For Jetson Devices:
| Jetson Linux Version | AGX Orin | AGX Orin Industrial | Orin NX | Orin Nano | Xavier Series | TX2 Series TX1 Nano |
|---|---|---|---|---|---|---|
| L4T 35.5.0 JetPack 5.1.3 - L4T 35.4.1 JetPack 5.1.2 | DS 6.3 | DS 6.3 | DS 6.3 | DS 6.3 | DS 6.3 | ❌ |
| L4T 35.3.1 JetPack 5.1.1 | DS 6.1 | ❌ | DS 6.1 | DS 6.1 | DS 6.1 | ❌ |
| L4T 35.2.1 JetPack 5.1 | DS 6.1 (Dev Kit, 32 GB) | ❌ | DS 6.1 (16 GB) | ❌ | DS 6.1 | ��❌ |
| L4T 35.1 JetPack 5.0.2 | DS 6.1 (Dev Kit) | ❌ | ❌ | ❌ | DS 6.1 | ❌ |
| L4T 32.7.5 JetPack 4.6.5 - L4T 32.7.1 JetPack 4.6.1 | ❌ | ❌ | ❌ | ❌ | DS 6.0 | DS 6.0 |
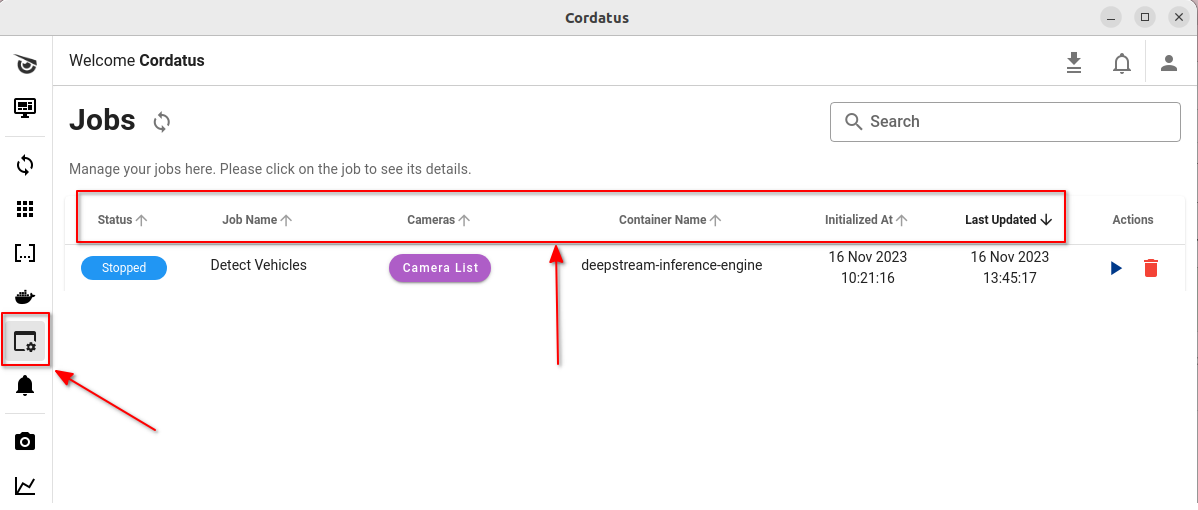
Monitoring and control of your model deployments are managed on the Jobs page. You can navigate to the Jobs page by clicking on the Jobs icon in the left menu of the Web App. On this page, you can view and manage all your jobs.
Starting a New Job
The deployment process for ready-to-deploy models, custom models, and pipelines is identical in Cordatus;
- Users can create various job instances from a single model or pipeline.
- A job has the capability to perform inferences using multiple camera streams, within the constraints of your device's license capacity.
To deploy a model or pipeline, follow these steps:
- Go to the Models page from the left menu on the Web App.
- Locate the model or pipeline you want to deploy.
- Click the Run button located in the right section of the model. The Deploy the Model modal will appear.
- Fill in the following details in the modal:
- Job Name: Provide a name for this job. The job will be identified by this name on the analytics screens.
- Select Cameras: Choose cameras for running your model.
- You can select multiple cameras for each job.
- One IP or RTSP camera can be used in more than one job simultaneously.
- Select a Device: Pick a device for running the inference.
- You can select only one device for a job.
- Your model will be deployed on this device, and the selected cameras will be connected to this device for inference.
- Click the Start button to initiate the deployment.
- Cordatus Client will build the model, connect the cameras, and start the inference process.
- Then, Cordatus will redirect you to the Jobs page, where you can manage your deployments.
- Click the Show Stream Details button to monitor inference results.
You can select any IP/RTSP camera for your job; however, only physical cameras connected to the device where the inference job will be executed can be chosen for the job.
For the first-time deployment of a job on a device, please be aware that the process may take some time based on the device and internet speed. During this initial deployment, the client will download and install the 30GB inference engine, onto the device. Users can monitor the download progress by clicking on the download icon situated in the upper right corner of the Client interface. After completion, the job will initiate automatically.
A new job can be started only on the Web App. However, while you cannot initiate a job using the Client, you do have the capability to restart, stop, or delete a job directly from the client.
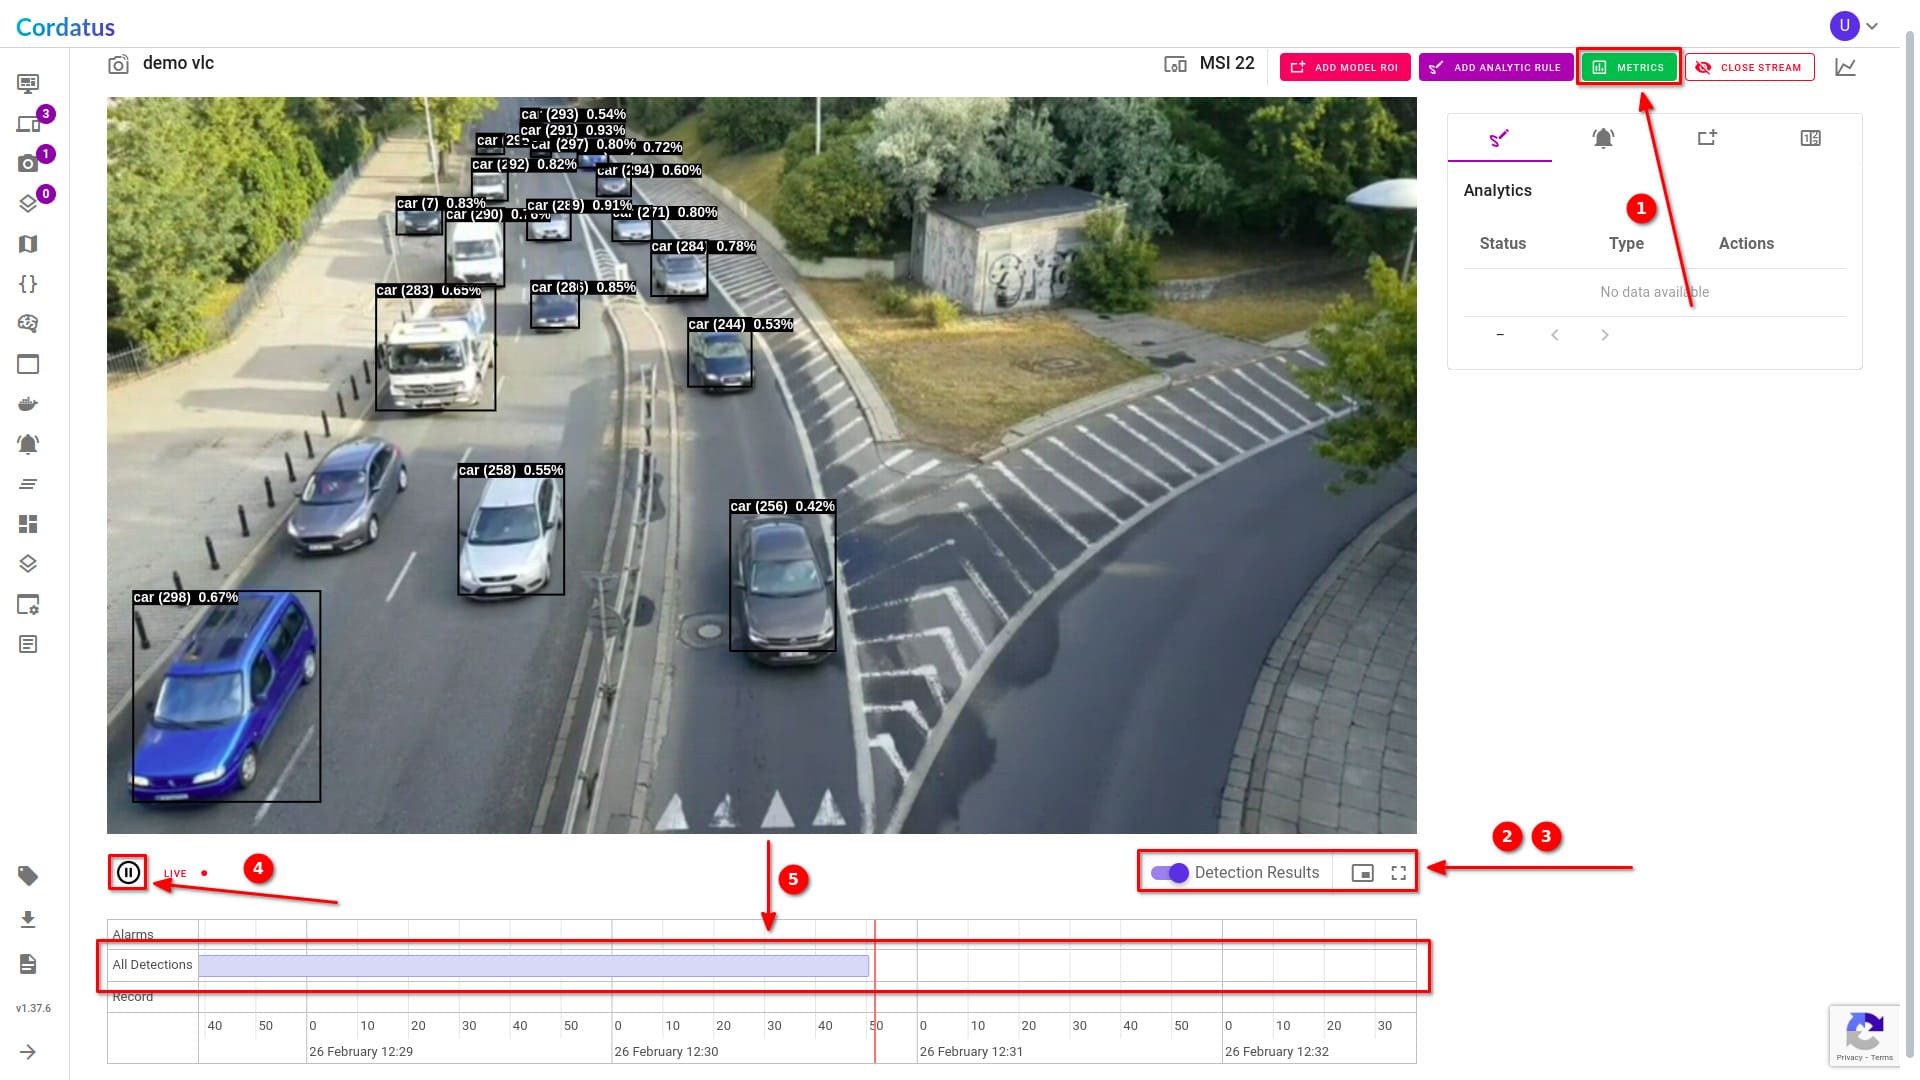
On the stream page, you can observe your inferred video images in real-time. Here are the actions you can perform on this page:
- View device metrics for the inference job with the green Metrics icon on the top right.
- Toggle the display of inference results with the Detection Results Toggle on the bottom right.
- Switch between picture-in-picture and full-screen mode using the icons on the bottom right.
- Pause or resume the video using the Pause/Play Icon on the bottom left.
- View the time spans during which the Cordatus has detected objects in the middle layer of the bar titled All Detections at the bottom.
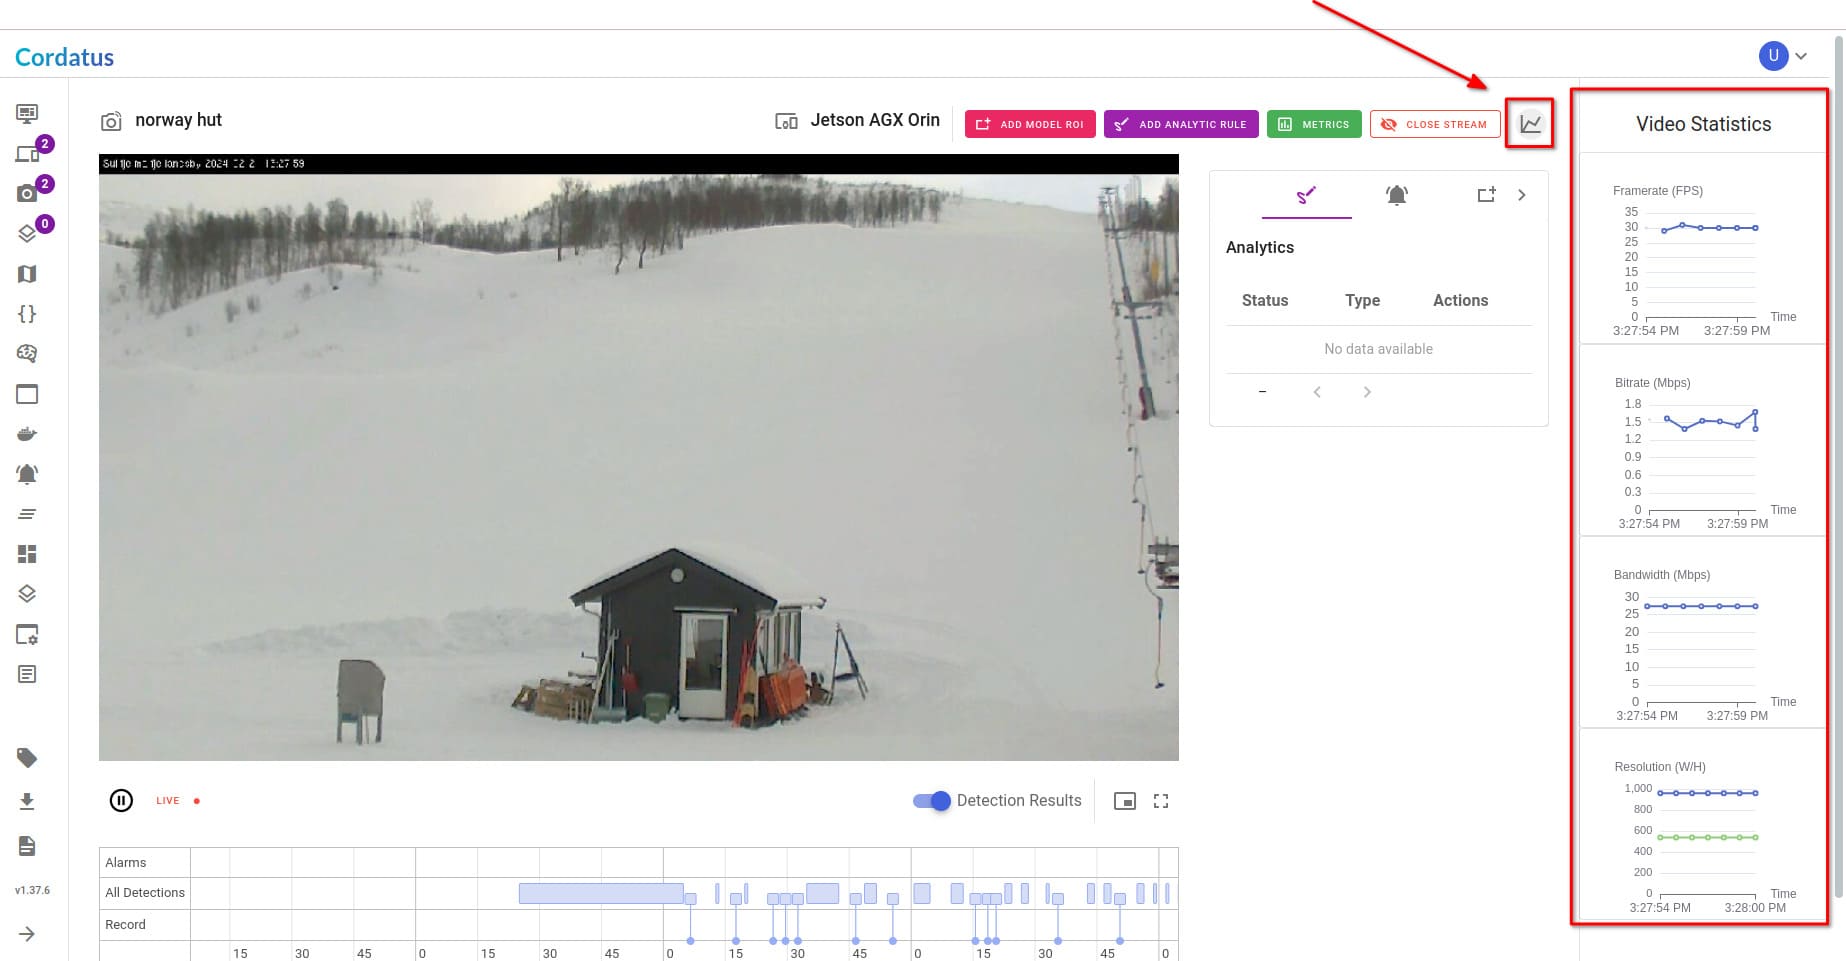
You can see more details about your stream by clicking the graph icon in the top right corner of the screen. A panel will appear where you can check the frame rate (FPS), bitrate, bandwidth, and resolution of your stream.
Stopping a Job
Stop a job by clicking the Stop button under the Actions column on the Web App. Cordatus will stop the job but did not delete the job and the related data. So, you can start the job again later.

You also have the option to stop a job using the Client by pressing the stop button.

Restarting a Job
You have the option to initiate a job with either a Stopped or Error status. For further insights into job status codes, refer to the Job Status Codes section. To restart a job on the Web App, simply click the Run button under the Actions column.

To restart a job on the Client, click the Run button under the Actions column.

Deleting a Job
You can delete a job by clicking the Delete button positioned under the Actions column.

To delete a job on the Client, click the Delete button on the job's row under the Actions column.

This process permanently deletes the job and all associated inference analytics data from the client device. Once deleted, this action cannot be undone. It's important to note that deleting a job has no impact on the deployed model or pipeline.
Job Status Codes
Cordatus assigns various statuses to jobs indicated by specific status codes, which are detailed in the following list. These codes provide insights into the lifecycle of a job, indicating whether it is operating as intended. The status codes are displayed in the first column of the job row, labeled "Status.
- Building: Occurs only during the first initialization of the model. The inference engine is building the model or pipeline.
- Preparing Engine: The pipeline is set up, and the engine is booting.
- Warming Up: The engine is prepared, getting the pipeline ready, and connecting to cameras.
- Running: The job is operating as expected.
- Stopped: The user has manually stopped the job.
- Error: An error occurred during job execution. Refer to the troubleshooting section for potential problems.

Using Interface
The Jobs page in Cordatus offers user-friendly features to enhance the overall experience:
- You can access detailed information about your jobs on this page, including the status, job name, the model used, attached cameras, the device running the job, the inference engine employed, and the start and update times. The information is organized under respective columns for easy reference.
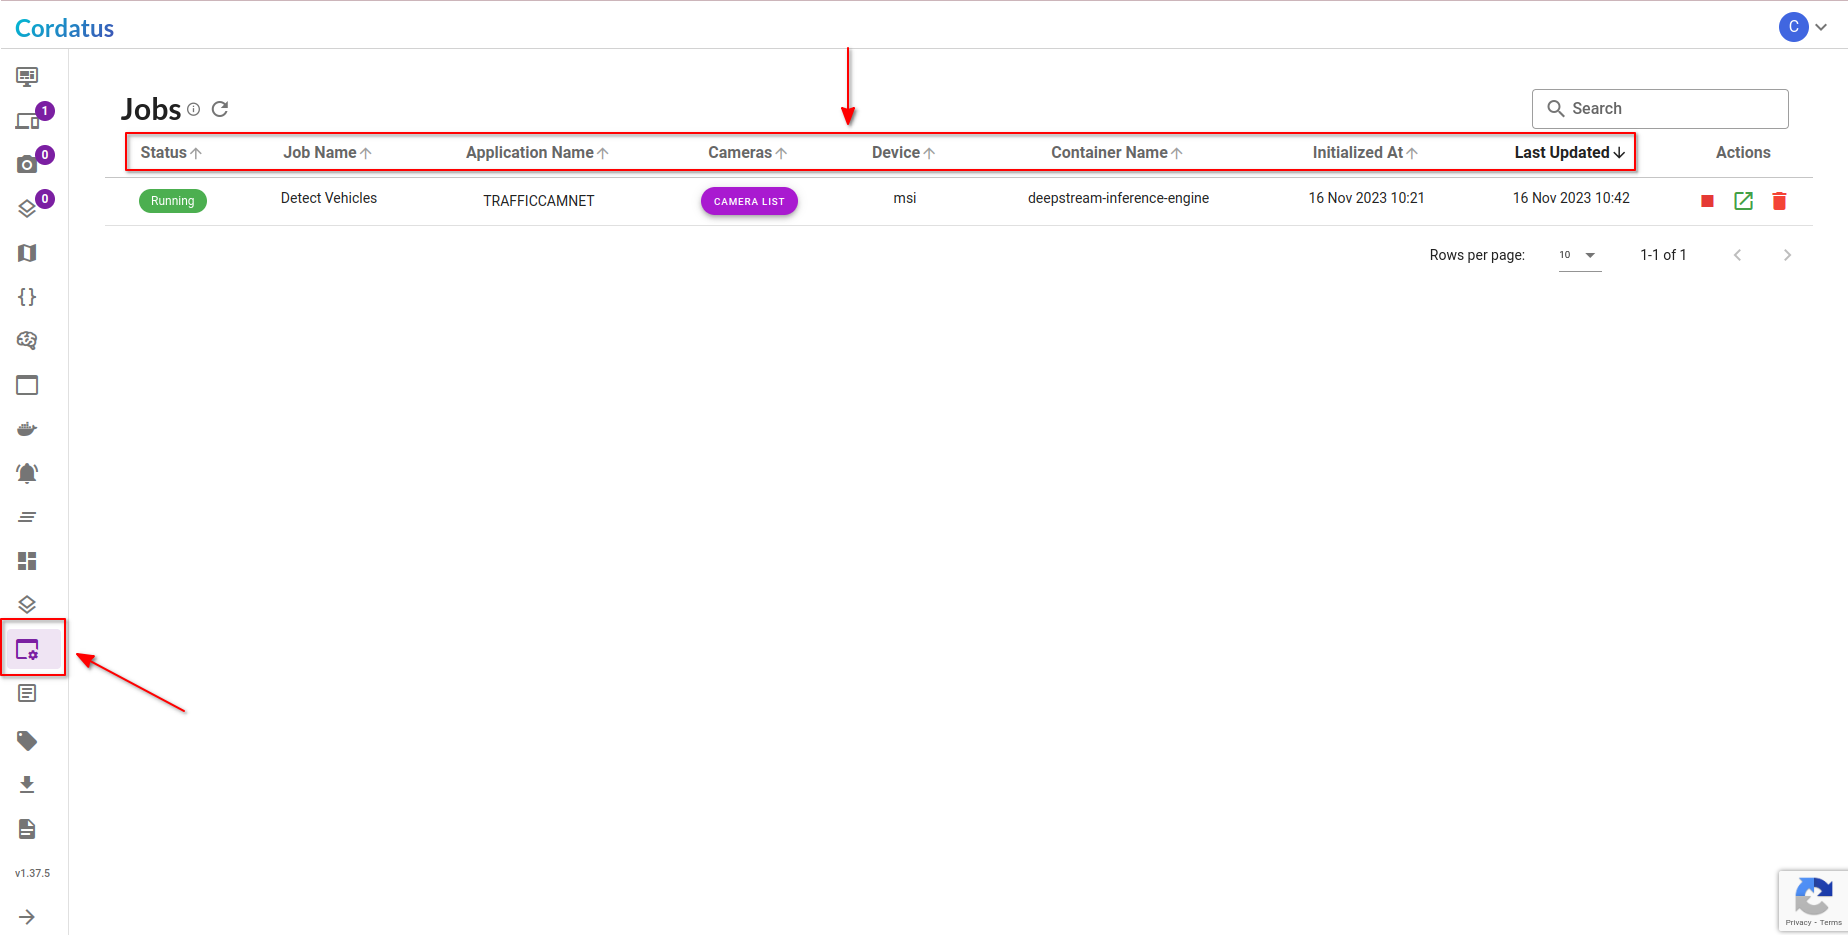
You can use the same features on the Client, excluding the device name (as you are already viewing the jobs of the device and cannot access other devices using a client) and the model used for the job.
- A search box located at the top right corner of the screen allows users to effortlessly find specific jobs by entering the job's name.

The same search box is also available on the Client.

- Users have the option to click on the titles atop the columns to conveniently sort their jobs based on the respective column data both on the Client and the Web App.
- A refresh button located at the top left corner of the screen enables users to update and refresh the job data displayed on the screen both on the Client and the Web App.


- You can customize the number of jobs displayed on a single page and navigate to other pages using the menu located below the list of jobs both on the Client and the Web App.


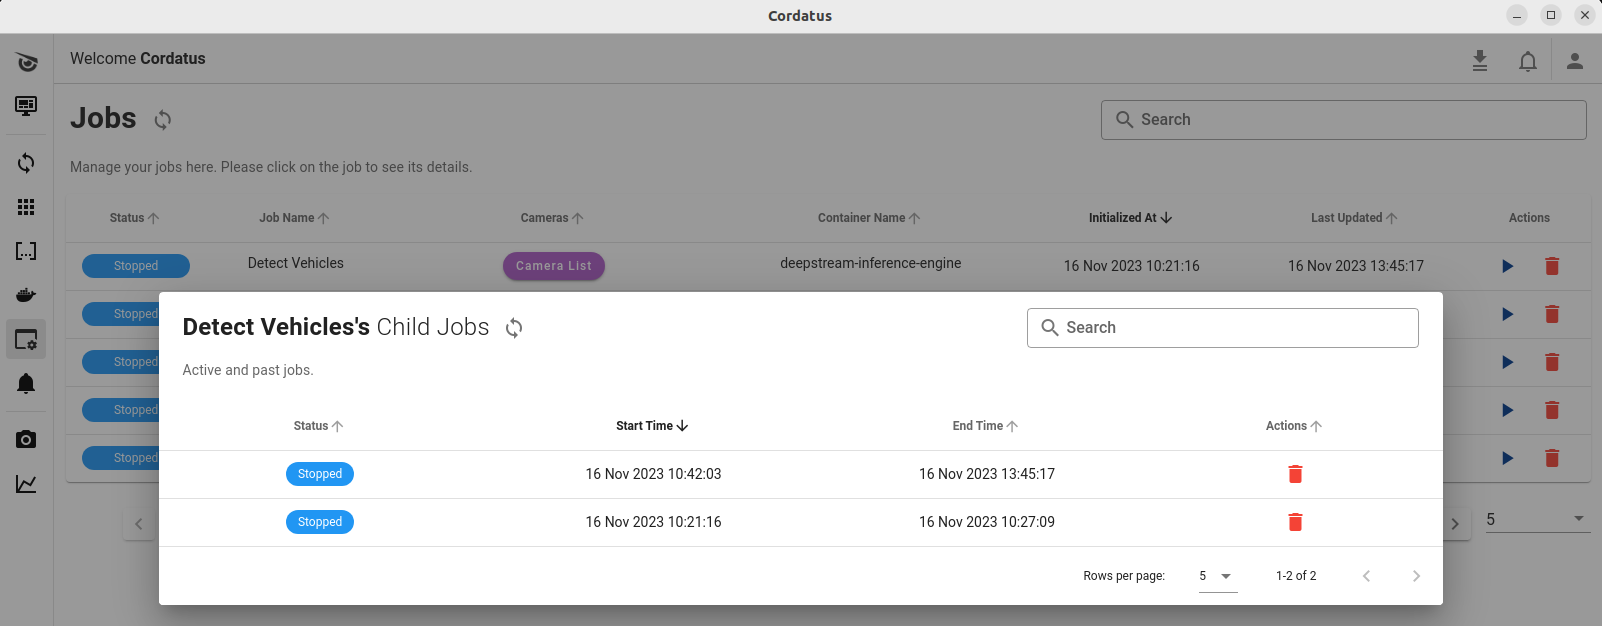
- When you click on a job on the Web App, a new modal will open at the bottom of the page, revealing the child jobs associated with the selected job. In this modal, users can explore the job's history, including details on how many times this job has been started in the past. Additionally, users can access information about child jobs, such as their statuses and starting and ending times. Users also have the option to delete child jobs by clicking the delete icon in the respective child job's row under the actions column.
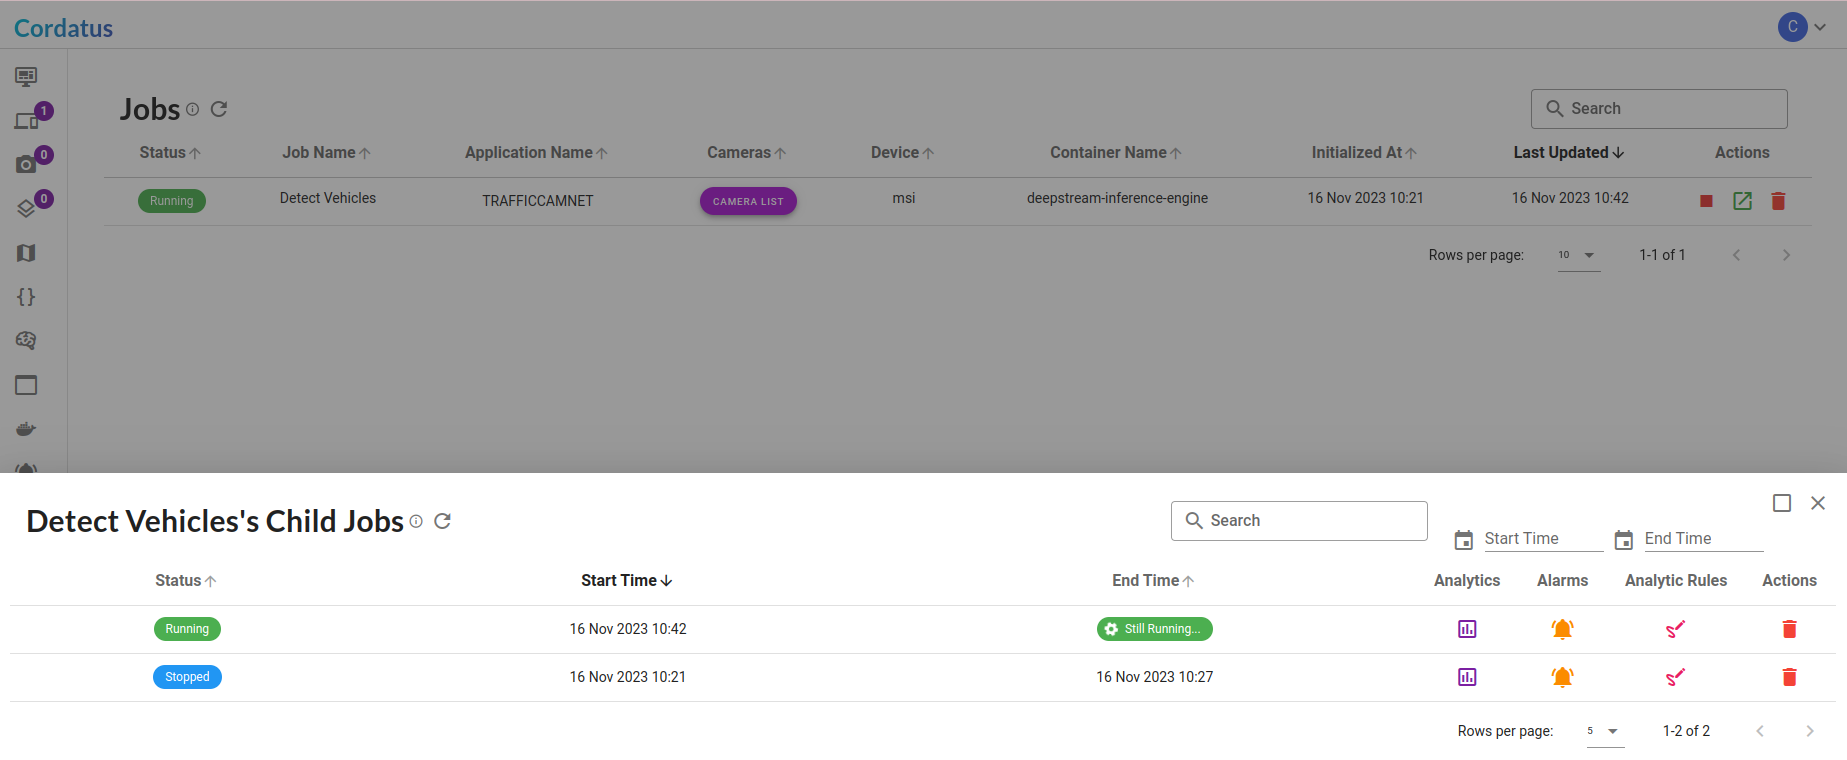
The same modal, with identical functionalities, opens at the center of the Client when you click on a job.
