Repositories
Repositories serve as a private cloud storage space for your custom Docker images. With Cordatus, you can distribute and access these images across all client devices. Make sure to check your Cordatus account for container storage limits.
Create and Remove a Private Repository
Creating a Private Repository
To create a new private repository, follow these steps:
- Go to the Private Repositories page through the left menu.
- Click on the Create Repository button. This action will trigger the Create Repository modal.
- Repository Name: Give a name to your repository. Note that uppercase letters and spaces are not allowed.
- (Optional) Description: Provide a description for your repository. You can use this space for a README or instructions.
- Click the Create button.
Your private repository is now created. However, it doesn't include a Docker image yet. To address this, you need to add a tag to the repository.
Removing a Private Repository
To delete a private repository, click the ellipsis icon in the top right corner of the repository card, and choose DELETE REPOSITORY from the menu that appears.

Adding and Deleting Tags in a Repository
Add a Tag to a Repository
To add a tag, follow these steps:
- Click on the Add Tag button below your repository.
- Device: Choose a connected device where the Docker image is stored. Only connected devices are displayed here.
- Image: Cordatus will display the Docker images on the selected device. Pick the image you wish to add to the repository.
- Tag Name: Assign a name to your tag. For instance, 2022.03-py38.
- (Optional) If the image will be used as an engine:
- Container Name: Specify a unique container name to distinguish the container.
- Script Path: This field requires the script file's path to initiate the engine.
- Model-label Structure: Since users might have custom model-label structures in their engines, Cordatus needs to be aware of this structure to use it in the Analytic Dashboard Feature.
- Click the Create button.
Cordatus will generate the tag and upload the image to the Cordatus Container Registry. Once completed, your image will be accessible from all your devices.
If the engine has multiple model-label structures, users can use the Add New Model button to include another model-label structure.
Removing a Tag from a Repository
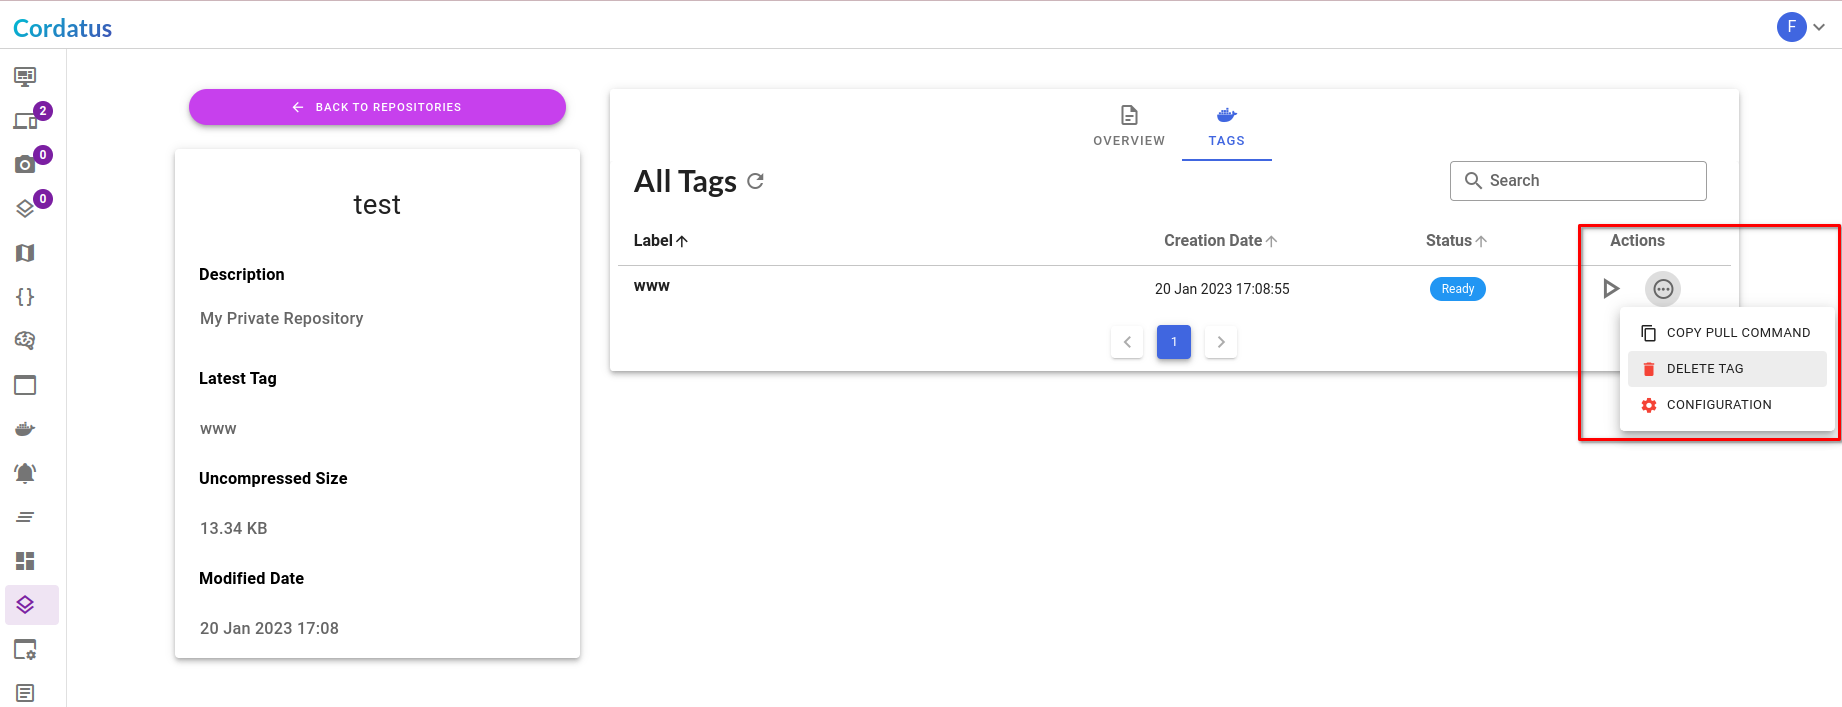
To delete a tag from a repository, click the ellipsis icon under the actions column for the desired tag and select DELETE TAG from the opened menu.
Repository Properties
By clicking the List Tags button on the repository card, users can access the All Tags page.
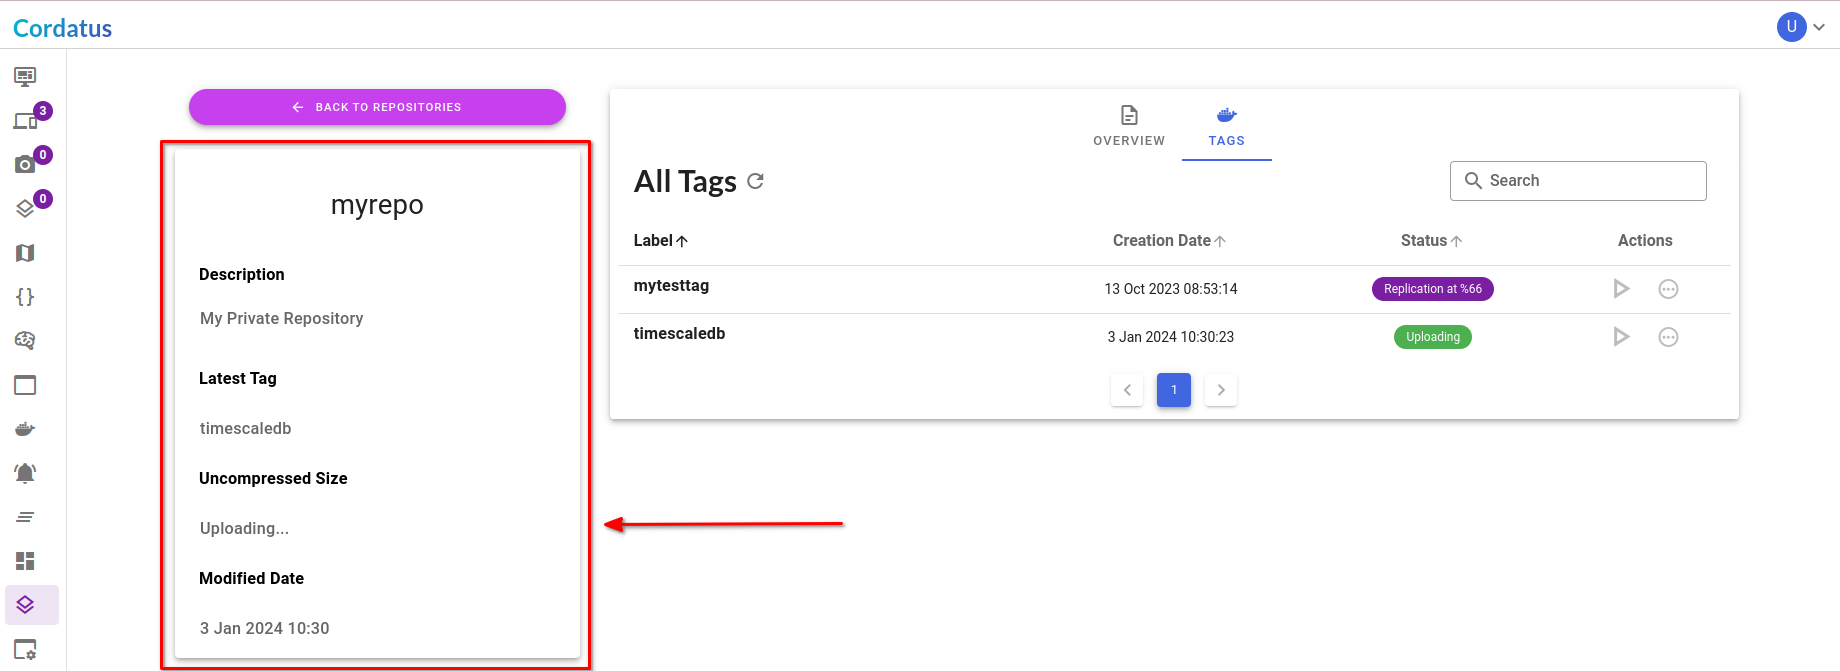
You can preview the repository properties from the left side panel:
- Description: Contains the repository description.
- Latest Tag: Displays the name of the latest pushed tag.
- Uncompressed Size: Shows the uncompressed size of the latest pushed tag.
- Modified Date: Indicates the last modification date of the repository.
Editing Repository Description
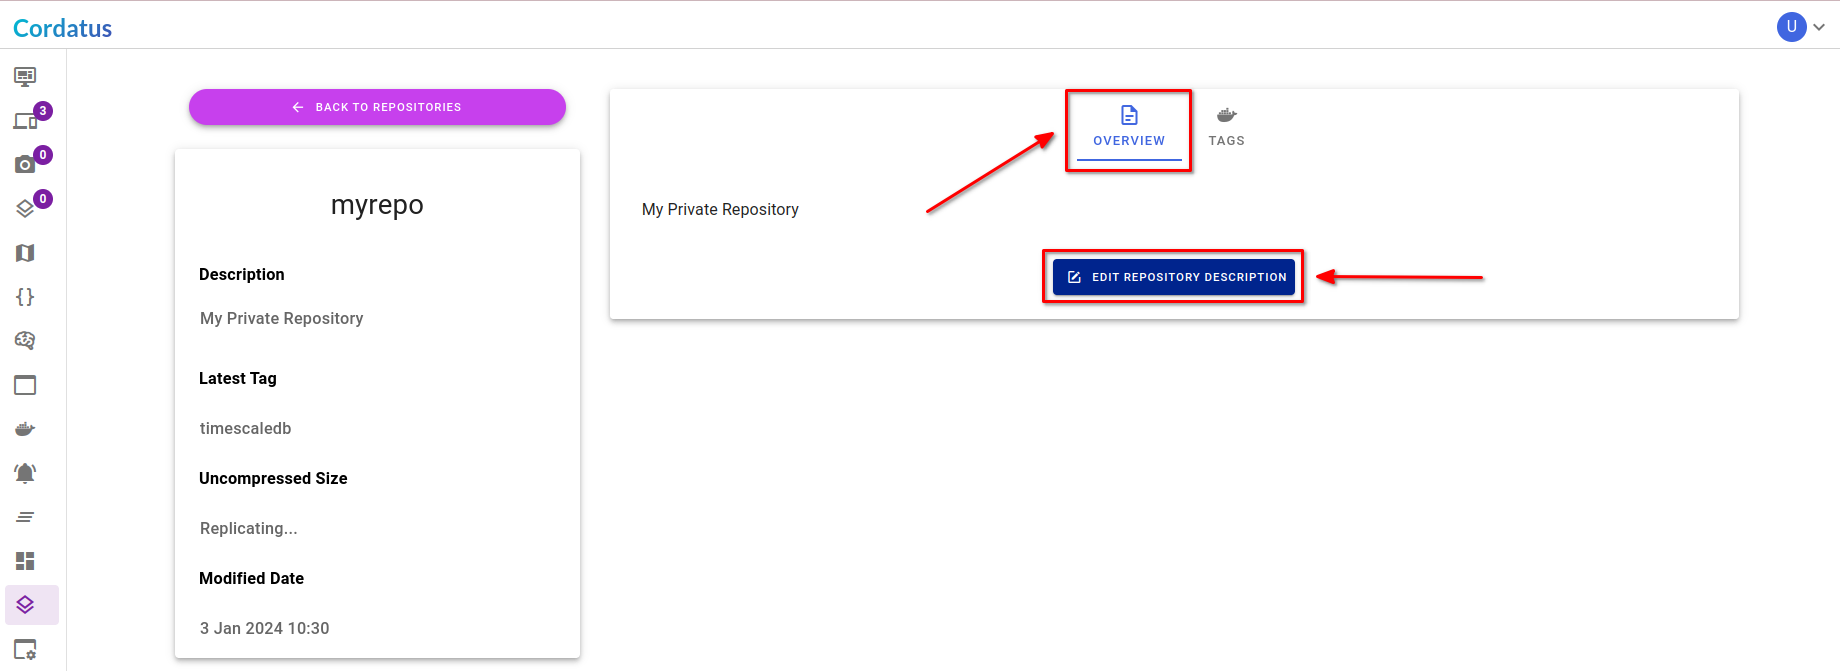
Users have the flexibility to edit the repository description according to their preferences using a text editor available in the Overview tab.
Listing Available Tags
The All Tags table displays a list of images that have been pushed to the repository.
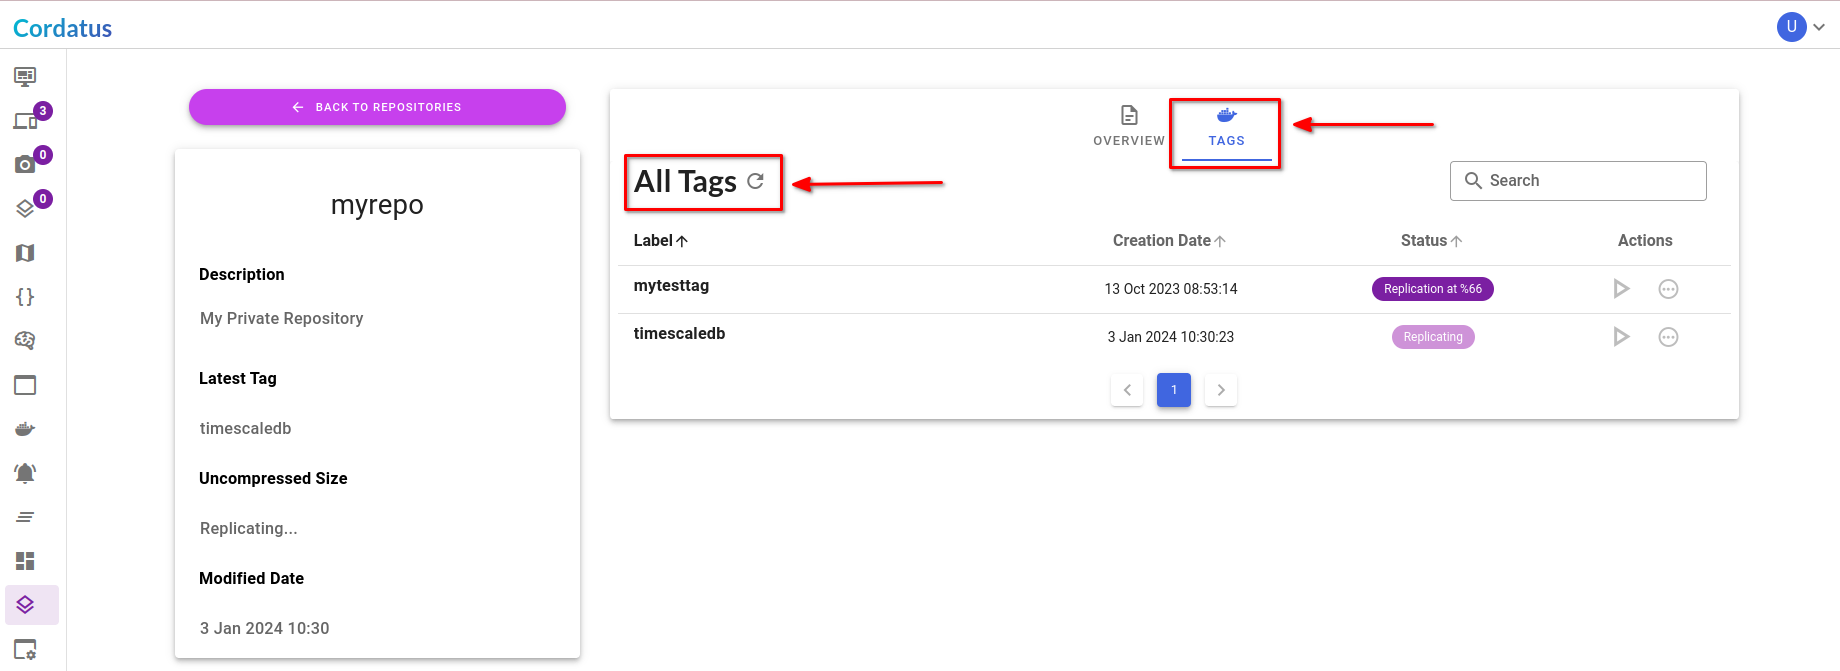
Starting an Environment from the Repository
To initiate an environment using a private repository, follow these steps:
- Go to the Private Repositories page in the left menu.
- Locate the repository you have created and click the List Tags button beneath it.
- Click the Start Environment button on the right panel of the tag. The New environment modal will appear.
- Select the device you want to start the environment on. The device must be connected to Cordatus.
- The GPU Isolation modal will appear. Choose the GPUs or compute units you want to connect to the environment, then proceed by clicking Continue for this modal and subsequently for the New environment modal.
- If the device has multiple GPUs, you can isolate them at the environment level.
- The Advanced Settings tab will appear.
- (Optional) Environment Name: Give a name to your environment container. If not given, Cordatus will generate it.
- (Optional) Attached Folders: Attach local folders to the environment container, e.g., dataset paths. To attach a folder, follow these steps:
- Click the Add Folder Binding button.
- Enter the path for your Source Folder and the destination for your Target Folder.
- You can attach multiple folders.
- (Optional) Jupyter Lab: Jupyter is a widely-used tool for AI development. You can make the most of the environments with Jupyter Lab. Cordatus automatically installs Jupyter and provides access. To launch Jupyter Lab with the environment, click the Start Jupyter Notebook button and enable it. If you don't initiate Jupyter Lab, you need to install and launch it manually.
- Security Options: You have the option to secure Jupyter Lab with a token or password. You can set your preferred token or password for authentication.
- Click Start Environment. Cordatus will download the environment if it doesn't exist and then start it.
- Access Jupyter Lab by clicking the Jupyter Icon. Cordatus generates an ephemeral URL for browser access.
Cordatus will launch the environment, providing you with access to utilize it.
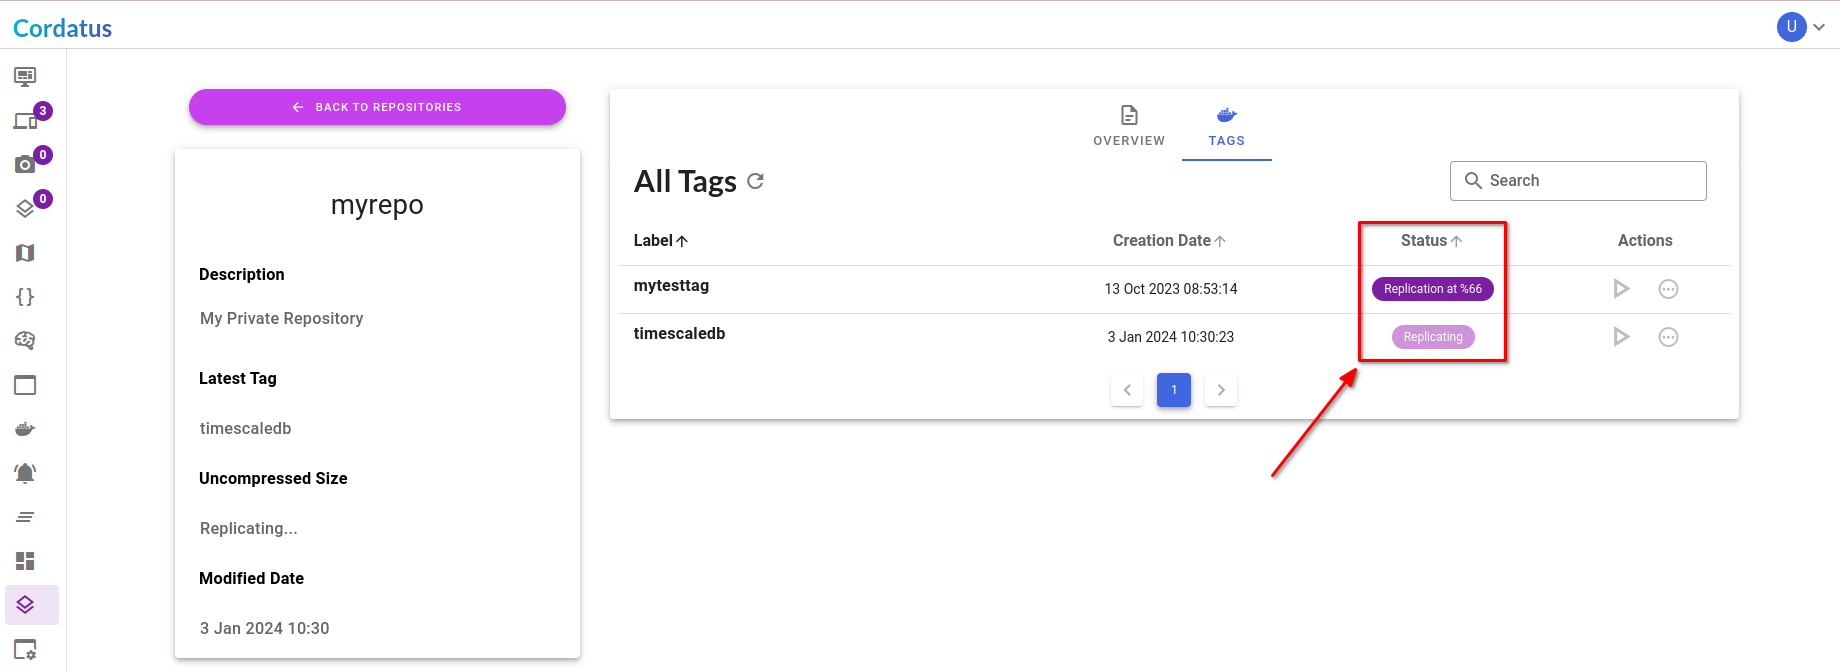
Tag Status Codes
- Ready: The tag has been successfully uploaded and replicated. It is ready for use.
- Uploading: The tag is currently being uploaded.
- Error: An error occurred during the tag upload process.
- Preparing: A new tag is being created from the original image.
- Replicating: This status indicates that the replication process has started.
