Map
Cordatus includes an easy-to-use location mapping feature that lets users add geographic data to cameras and devices. This data is displayed on a world map in Cordatus, giving users a clear and efficient way to manage their assets. This feature improves locational awareness and simplifies the overall management of devices and cameras within the Cordatus system.
Adding Location Data for Cameras
Adding location data for your cameras is seamlessly incorporated during the process of adding them to Cordatus. Refer to the Connecting a Physical Camera and Connecting an IP Camera sections for instructions on how to include location details during the camera addition process.
Viewing Devices and Cameras on Map
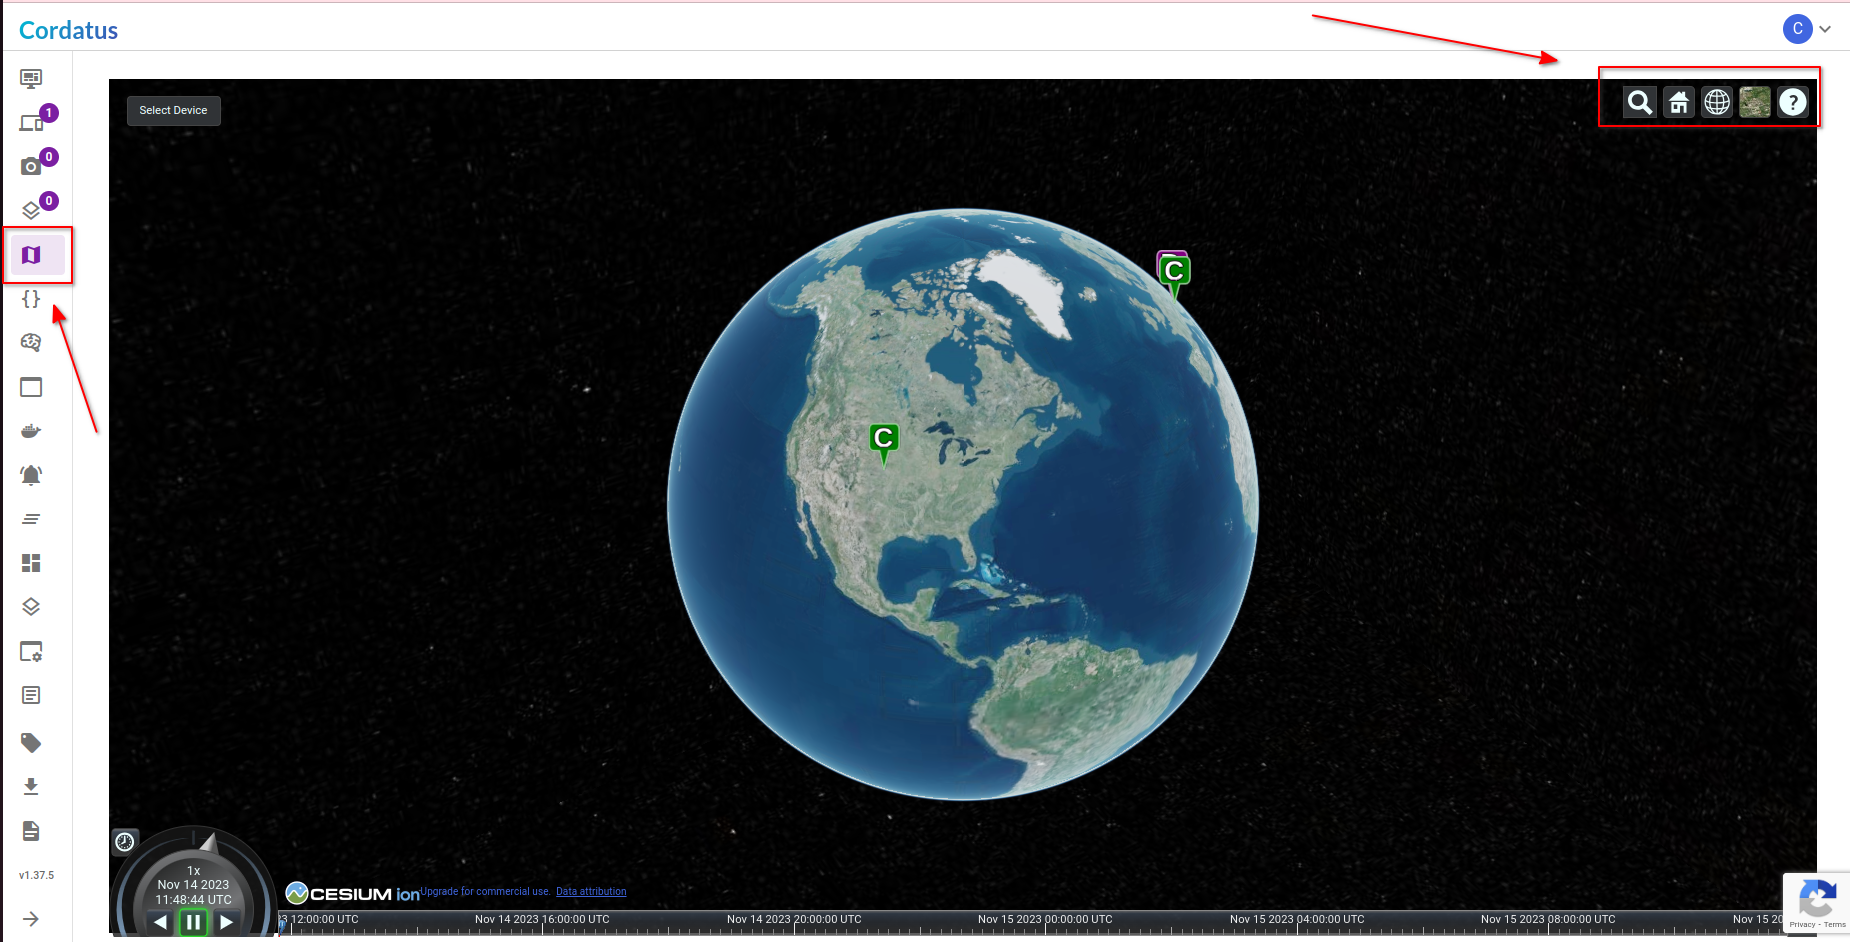
To view your devices and cameras on the world map, navigate to the Map page through the left menu on the Web App. On the map, all your devices will be visible simultaneously. Devices will be denoted by a purple label labeled "D," and cameras will be represented by a green label labeled "C".
You can interact with the map using the following options, accessible through the icons in the top right corner:
- Initiate a location search by using the search icon (magnifier) at the top, entering the name of the area, address, landmark, or coordinates.
- Adjust the map by zooming in and out using the mouse wheel or dragging with the mouse for navigation.
- Utilize the home icon to revert to the initial state of the world map if necessary.
- Customize the map between 2D and 3D views or change the map type through the globe and map icons at the top.

Accessing Cameras
- To access your cameras, you have two options:
- Click on the icon representing the desired camera.
- Use the dropdown menu titled Select Device:
- Choose a device from this list.
- On the menu that appears under the Select Device menu titled Select Actions, choose Show Cameras.
- Then, select your desired camera from the menu titled Select Camera under the Select Actions menu.
- Once a camera is selected, a new modal titled Select a Target Device will appear. Choose the device where you want the incoming stream to be decoded.
- The stream will start in the bottom right corner of the screen.
- You can move it by dragging the window or make it full screen by right-clicking on it and choosing Full Screen from the menu that appears. To exit full-screen mode, hit escape.
- To close the stream, right-click on it and choose Close Stream from the menu that appears.
Removing Location Data From Cameras
Removing location data from cameras is not allowed. To achieve this, remove the cameras you wish to edit, and then re-add them without providing location data. Follow the steps outlined on the Cameras page for this process.