Groups & Tags (Fleet Organization)
Groups & Tags help you organize your fleet, target actions, and filter fast.
This page covers: why grouping matters, how to create/edit/delete groups and subgroups, how to assign devices with drag-and-drop, how to use tags, and best practices.
Why use Groups and Tags?
- Clear structure: Build a hierarchy like Country → Site → Room.
- Scoped access: Combine with roles to delegate parts of the fleet.
- Better reporting: View smaller slices of your fleet.
Key concepts
- Group / Subgroup: A folder-like container for devices. Supports deep hierarchies.
- Tag: A short label on a device.
- Membership: A device can belong to multiple groups (and have many tags).
Groups show where a device belongs in your structure.
Tags describe what a device is or how you want to target it.
Group list
Groups are shown on the left as a tree.
When you select a group, the Devices table on the right shows only devices in that group and its subgroups.
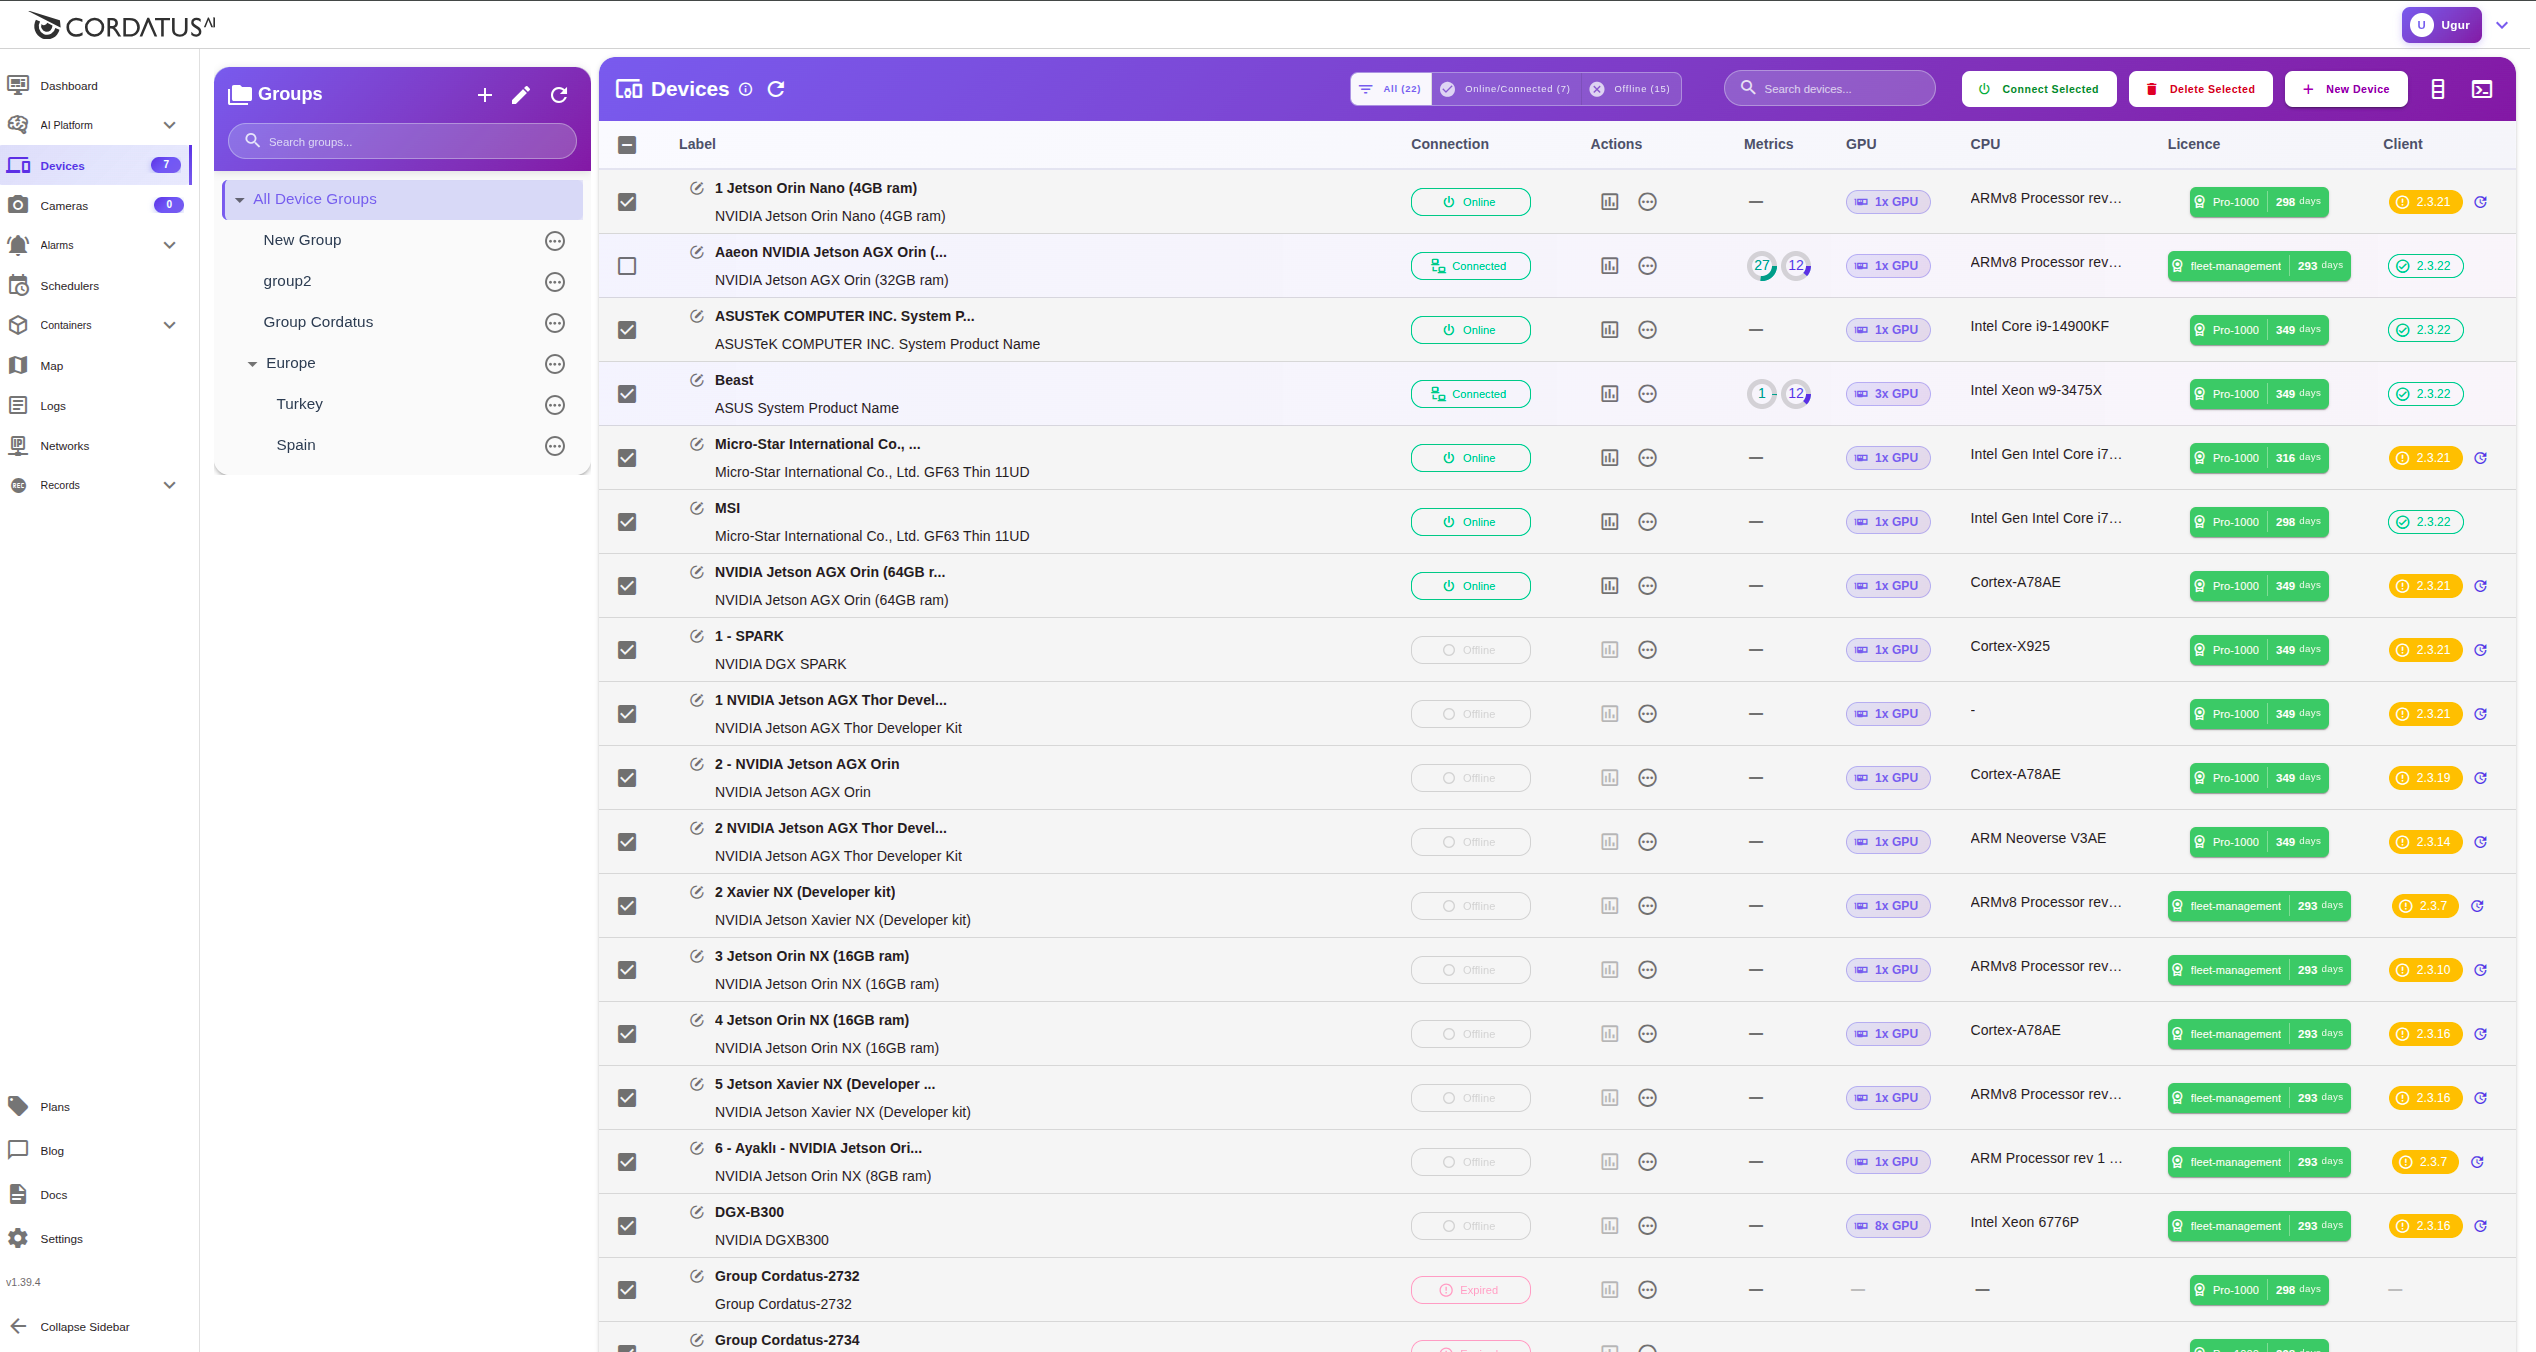
In the tree view you can expand or collapse groups with the triangle icon, and quickly search by typing a group name.
Create, edit, delete groups
Create a new group
- Click the blue plus icon in the upper right corner of the Groups window to open the New Group Modal.
- Enter a Name
- Optionally add a Description.
- If this group is intended as a subgroup within a parent group, select the relevant parent group.
- Add tags to your group for descriptions and easy management.
- Click Save.

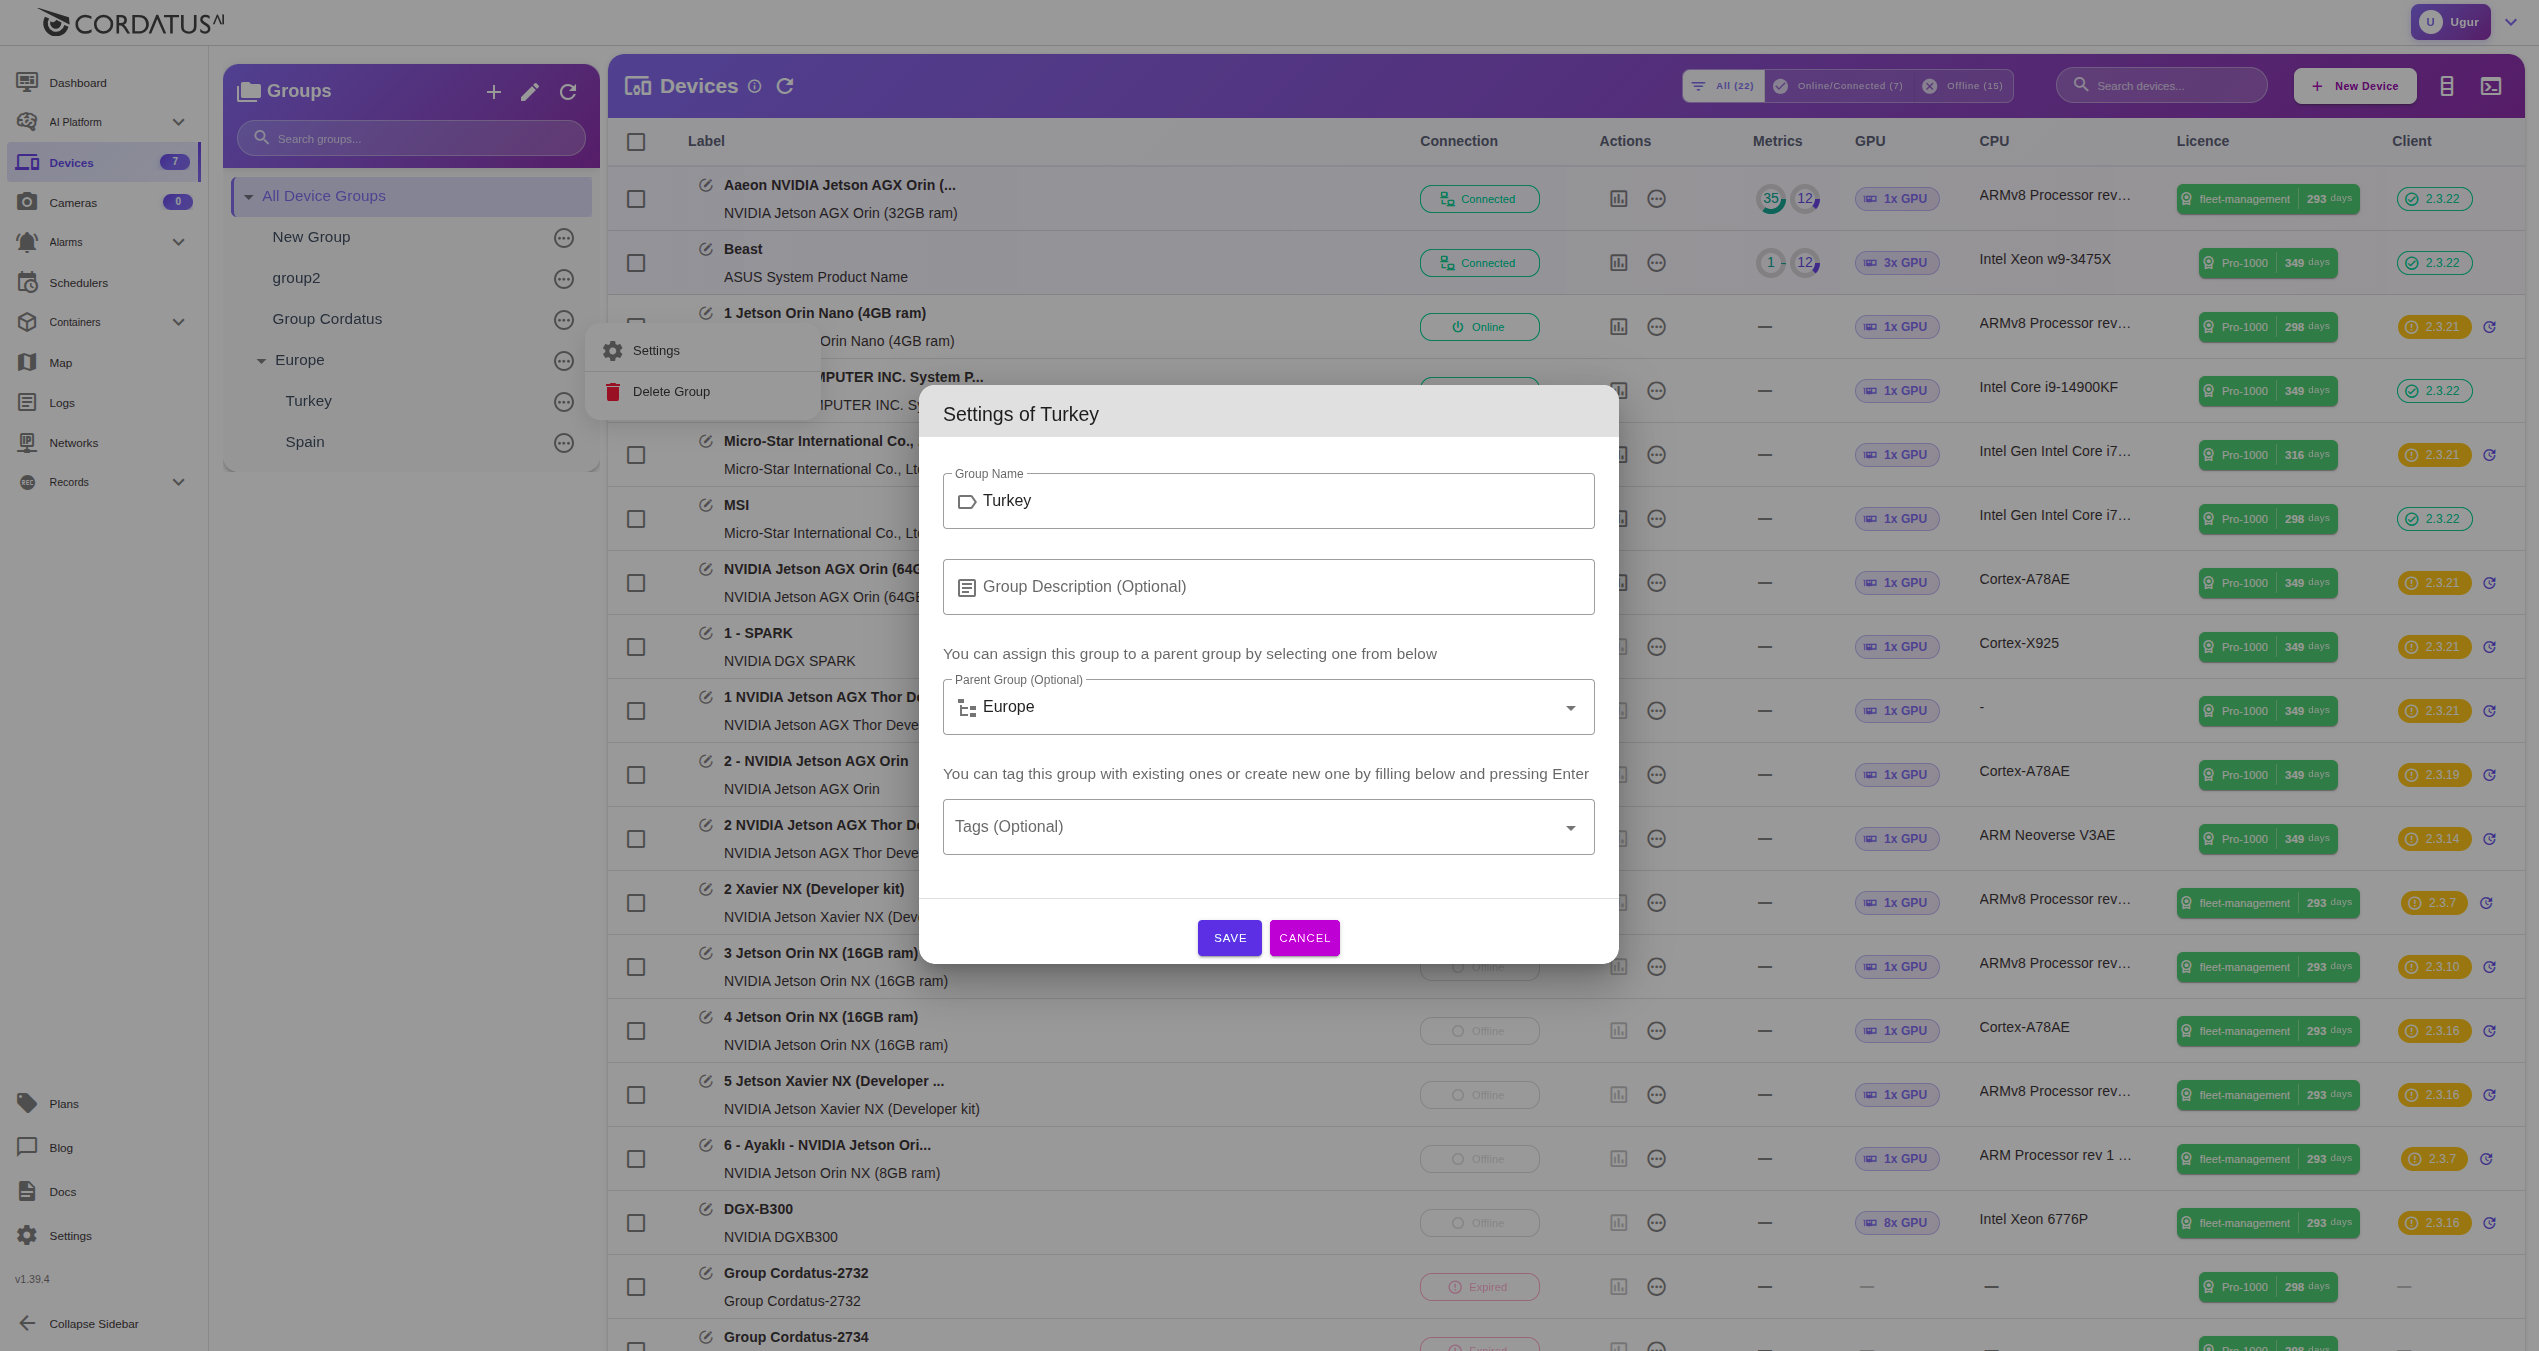
Edit a group
- Click the group’s ellipsis icon.
- Select the Settings button.
- Modify the name, description, parent group, and tags.
- Click Save.
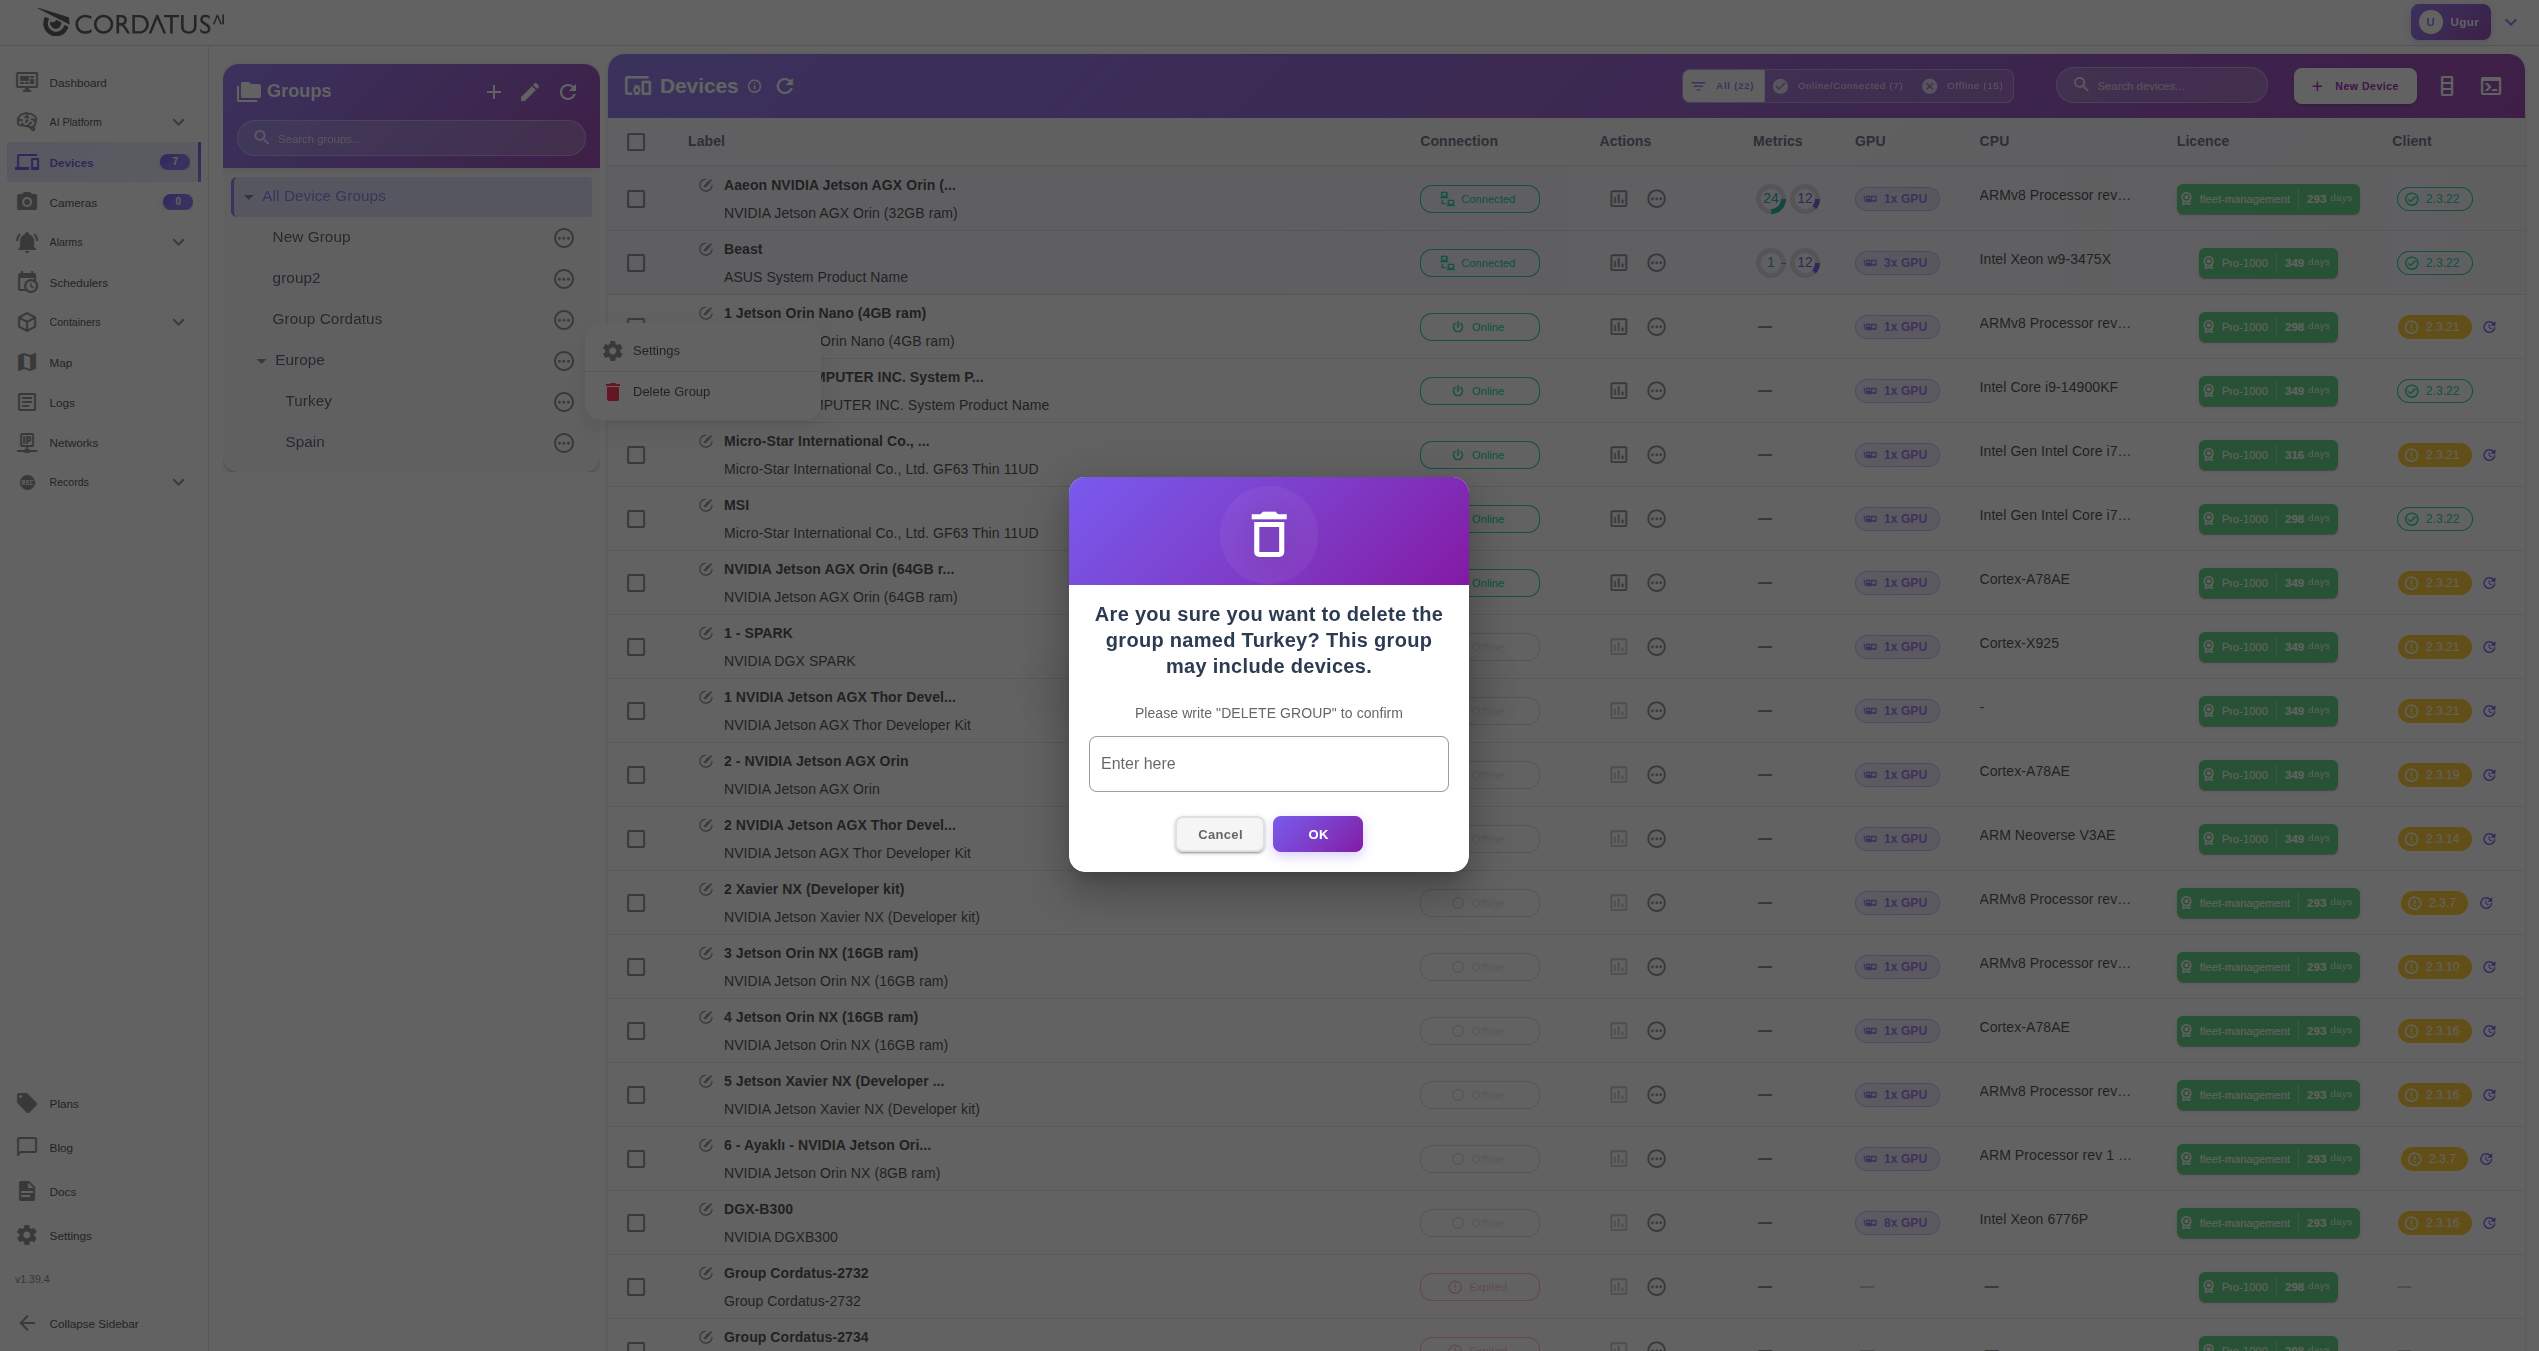
Delete a group
- Click the group’s ellipsis icon.
- Click Delete Group.
- Type "DELETE GROUP" in the confirmation box.
- Click OK.
Deleting a group does not remove device tags. The delete action cannot be undone.
You must delete all subgroups before deleting a parent group.
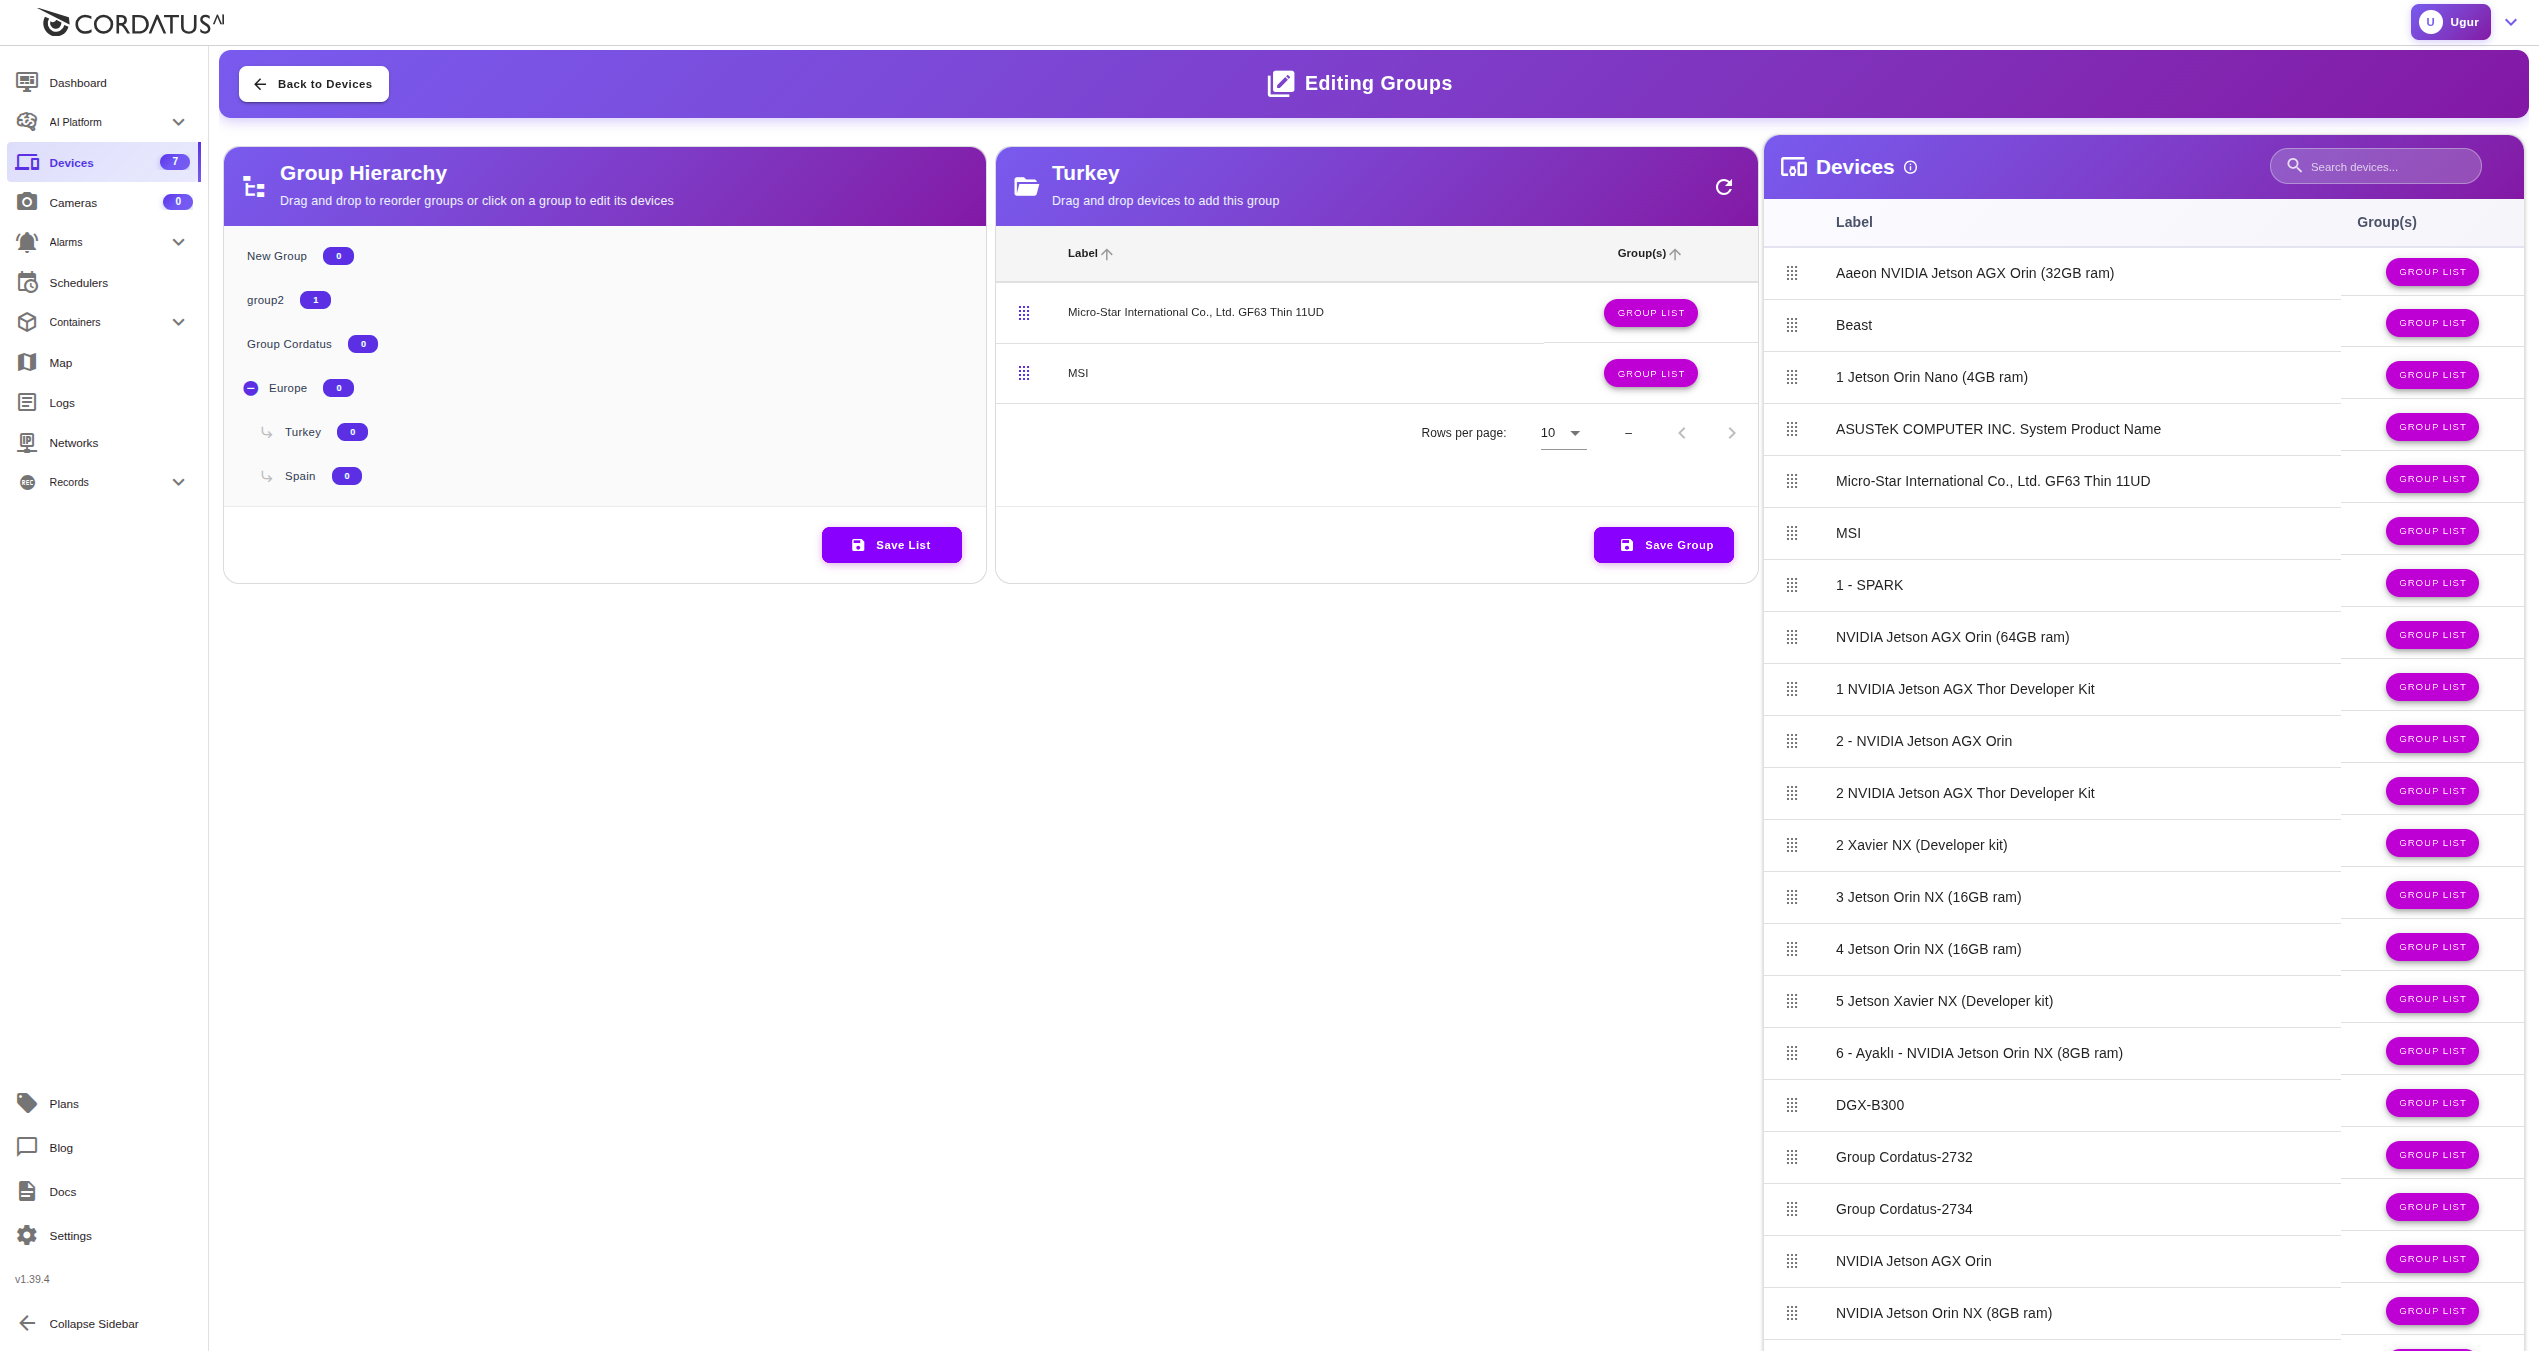
Assign devices to groups
To assign devices to groups:
- Click the green pencil icon in the top-right of the Groups pane to open Editing Groups.
- To reorder groups, drag and drop in the Group Hierarchy pane, then click Save List.
- Select the target group.
- From the Devices pane on the right, drag the device(s) and drop them into the group pane in the middle.
- To remove a device from a group, drag it back from the middle pane to the Devices pane.
- When finished, click Save Group at the bottom.
- For more groups, repeat steps 3–6.
- Click Back to Devices (top-left) to return to the Devices page.
- In the Groups pane, click a group name to view its devices.
Group-scoped views and actions
When a group is selected:
- The Devices list shows only that group and subgroup.
- Bulk actions like Connect and Remove apply to devices in this scope.
FAQ
Does deleting a group delete devices?
No. Devices stay in your account and become unassigned.
Can a device be in multiple groups?
Yes. A device can belong to multiple groups.
Is there a tag limit?
Effectively high. For manageability, keep 5–15 tags per device as a guide.