Runtime & Resources
Runtime & Resources gives a quick, actionable view of what is running on a device and what resources it uses.
This page has three tabs: Containers, Storage Info, and Sensors.
Containers
Containers is a page that shows all containers on the device.
Here you could normally start / stop, remove, and view logs of containers.
These functions are not included in the default Cordatus Fleet Management license.
If you want to use them, you need to buy the correct license and follow the instructions in that section.
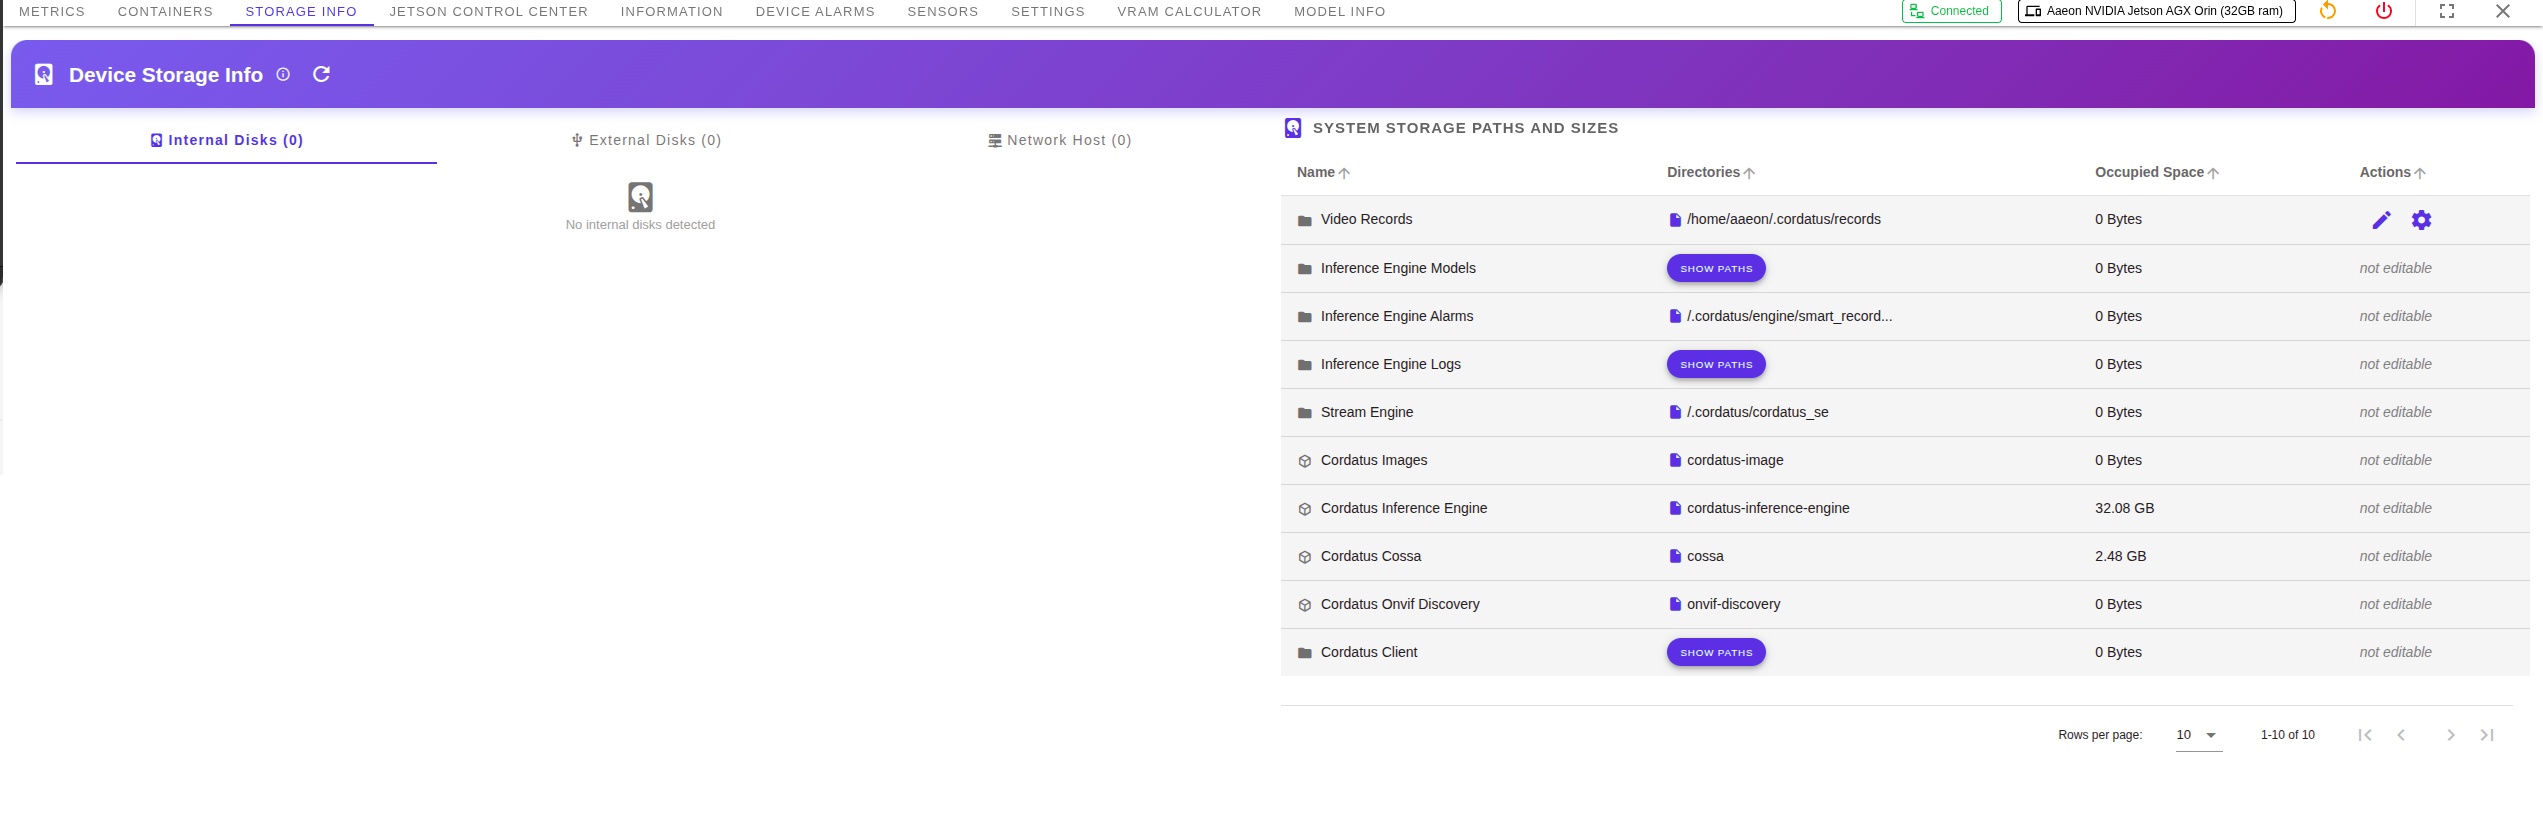
Storage Info
Storage Info shows the storage usage of the device.
It lists mounted partitions (root, extra disks, or network disks) and their usage, and also shows system folders used by Cordatus.
You can access storage info tab by clicking the ellipsis icon and selecting the storage info tab. On this tab you will see:
- Internal Disks — Shows the root partition (
/) of the device, with total size, used space, and free space. - External Disks — Any extra disk mounted to the device.
- Network Host — Network shares mounted as storage.
- System Storage Paths — Folders created and used by Cordatus (for example: Video Records, Inference Engine Models, Logs). Shows path, occupied size, and editable or not.
Settings for Video Recording (saving camera/stream outputs) are shown in this page, but this feature is not included in the default Device Hub license.
To use recording, please check the related license section.
Sensors
Sensors lets you connect and track extra hardware sensors on the device.
You can add sensors such as GPS or IMU and use their features.
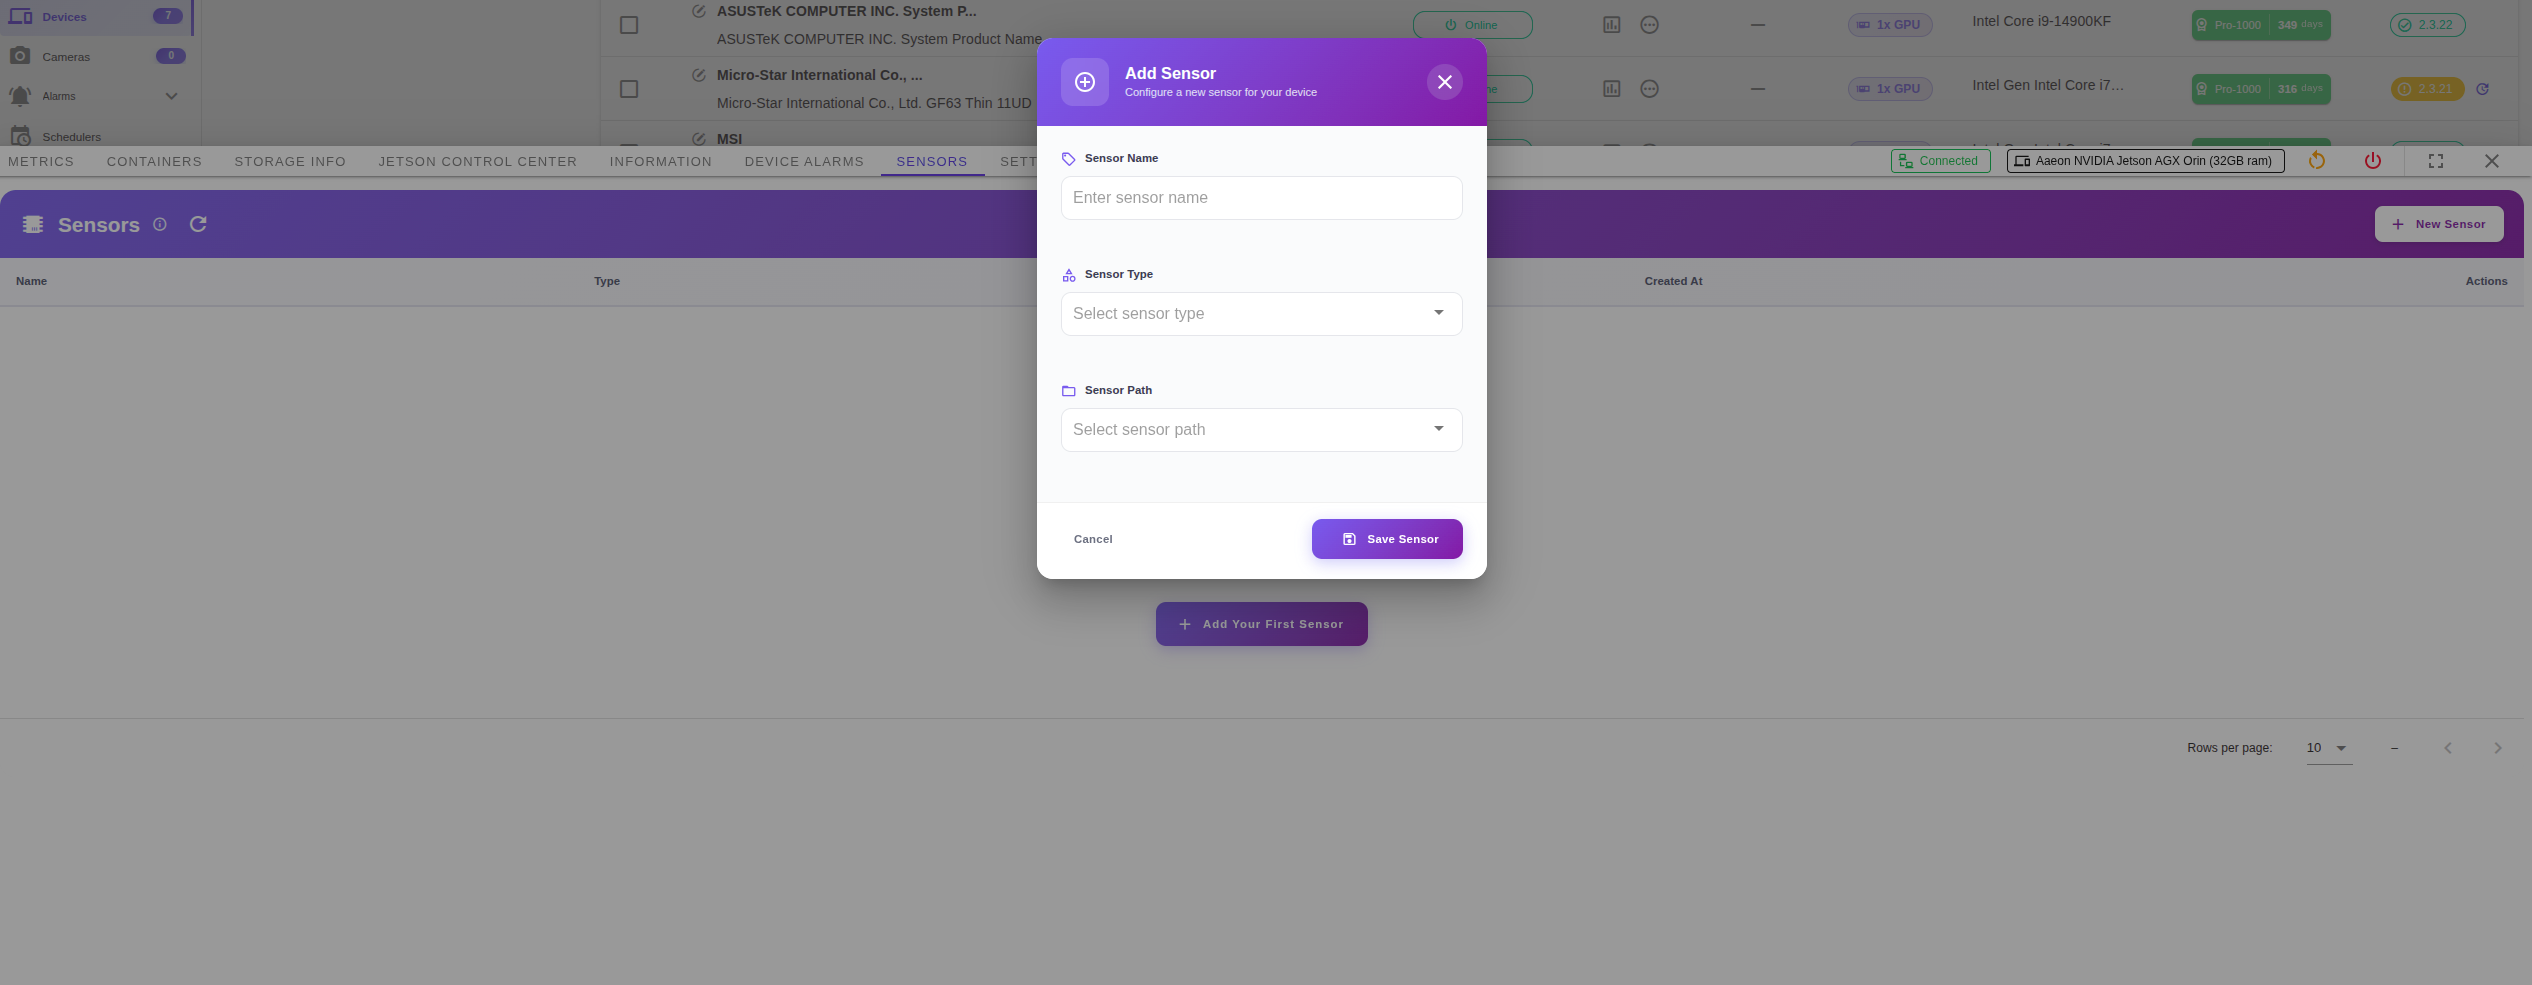
Add a new sensor
- Go to the Sensors tab by clicking the ellipsis icon for the device and selecting the sensors info tab.
- Click the New Sensor button.
- Enter:
- Name — A clear name for the sensor (for example:
Front-GPS,Drone-IMU). - Type — Choose sensor type:
- GPS — Provides location (latitude, longitude). Can be used to show live device location in the Map page.
- IMU (Inertial Measurement Unit) — Provides motion and orientation data (accelerometer, gyroscope, magnetometer). Useful for devices that move or rotate.
- Sensor Path — Path or interface used by the device to read this sensor.
- Name — A clear name for the sensor (for example:
- Click Save Sensor.
Sensor list view
After you add a sensor, it appears in the Sensors list.
For each sensor you can see:
- Name — The name you gave.
- Type — GPS, IMU, or other supported type.
- Path — OS path to your device.
- Created At — When the sensor was added.
Troubleshooting
-
Storage usage shows “N/A”
- The device may not have shared mount info yet. Click Refresh.
- Check permissions on the device.
-
Sensors not updating
- Sensor service may be offline.
- Verify connections and check device Logs.