Watching Alarm Records
Alarms → Report opens the Alarm Dashboard: an alarm-focused player that brings together everything Cordatus stored when your AI jobs raised an alarm — the video of the moment, the screenshot, the camera, the device and the exact time.
Unlike normal recording playback, this screen is organised around events, not around continuous footage: the timeline only contains the moments where something happened.
How an Alarm Record is Created
- A job runs an AI model on one or more cameras (AI Platform → Jobs).
- An alarm is attached to the job (see Alarms).
- When the rule is satisfied, the device stores
- a screenshot of the triggering moment,
- the detection data (label, box, confidence),
- the video segment around the event.
- The event is listed here and — if the alarm has channels — sent as a notification.
Choosing Jobs and a Time Range
The page starts empty, because alarm records always belong to jobs.
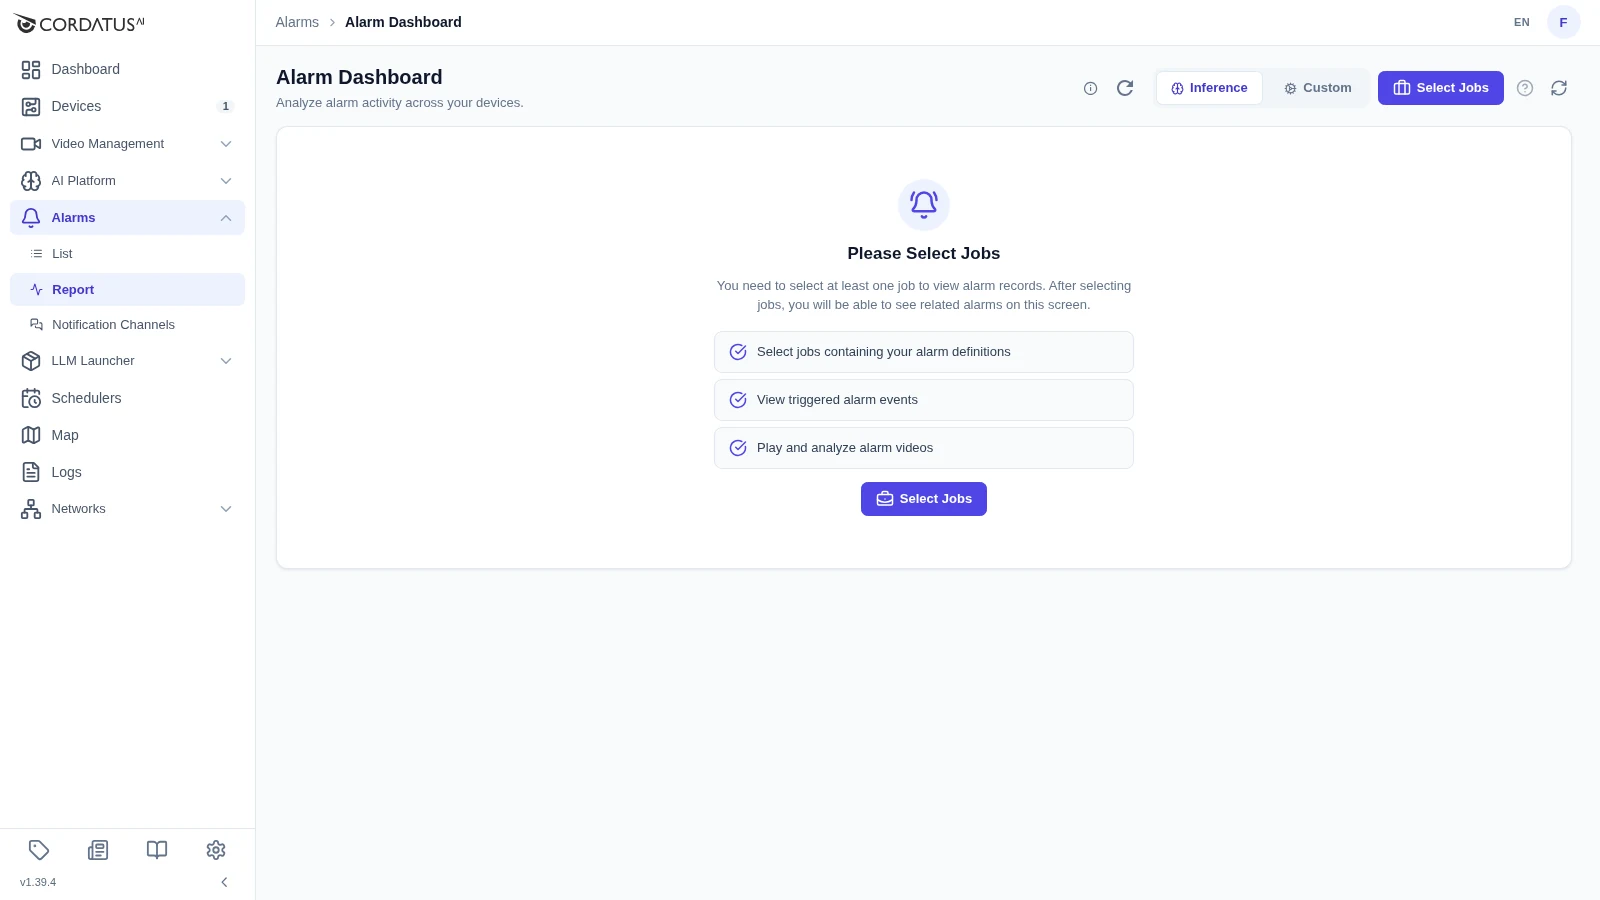
- Click Select Jobs.
- Choose a Quick Range — or type a Start Date / Start Time and End Date / End Time for a custom window.
- Tick the jobs whose alarms you want to review. The table shows each job's device, status, camera count, creation date and last activity, so you can tell at a glance which job is worth opening.
- Click Select.
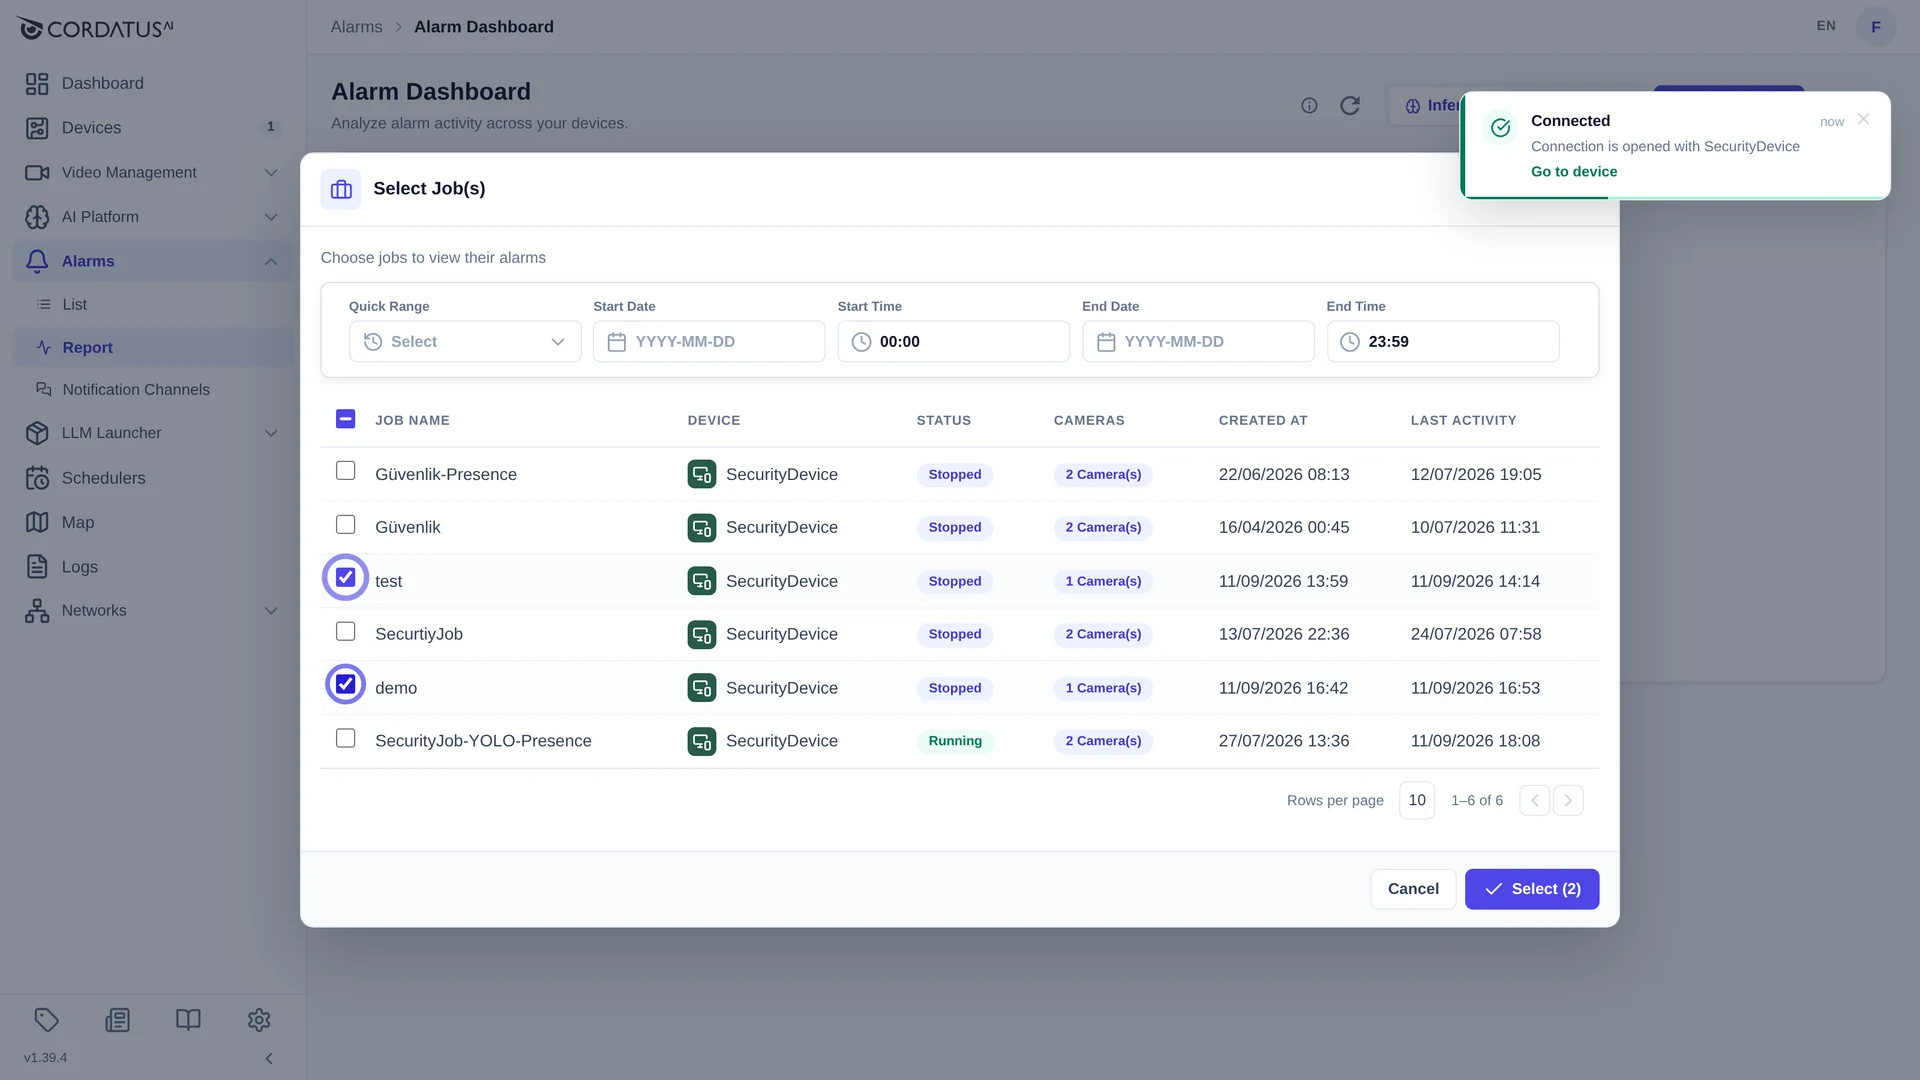
Cordatus then connects to the devices of the selected jobs, loads the alarms of the period and places them on the timeline and in the alarm table.
Selecting fewer jobs and a narrower time window makes the page noticeably faster — start with Today and widen the range only if you need to.
The Interface
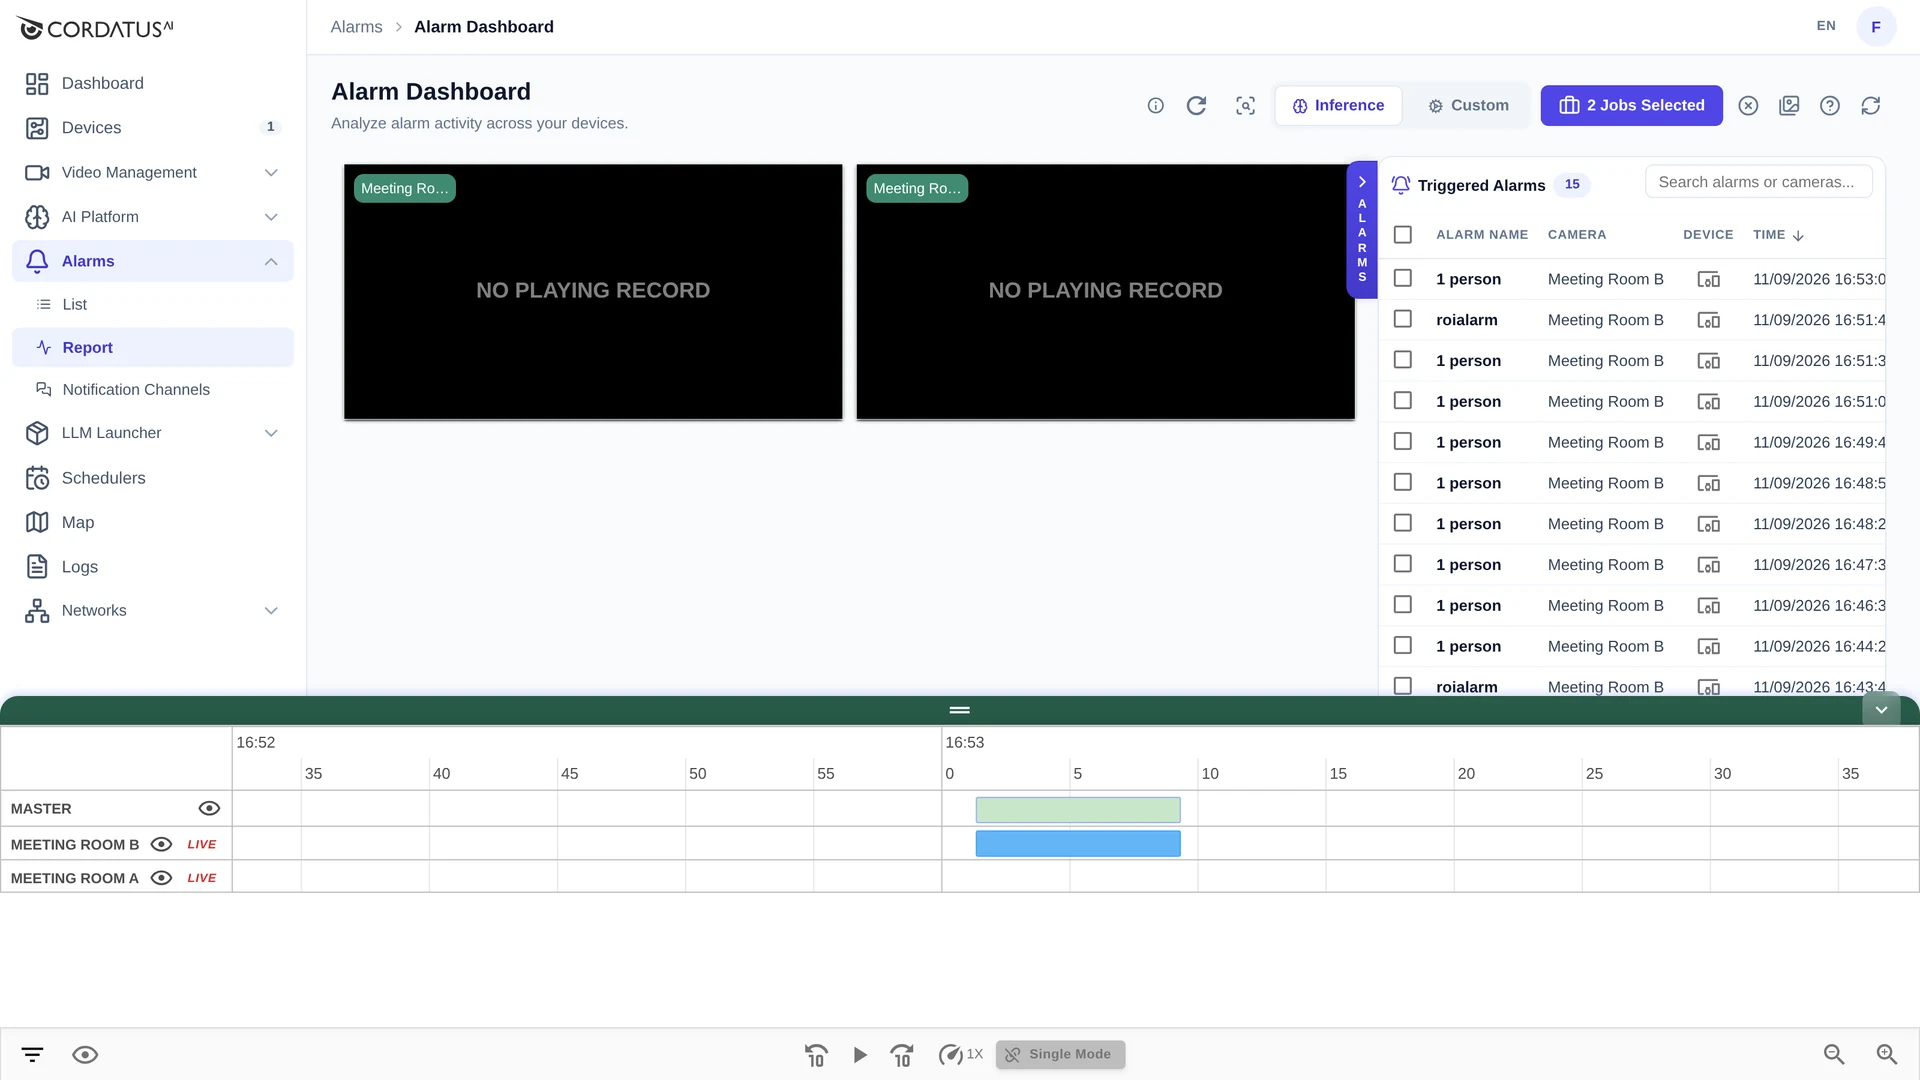
The screen has four areas:
| Area | What it shows |
|---|---|
| Video grid (top left) | One player per camera. A player shows NO PLAYING RECORD until you open an alarm. |
| ALARMS panel (right) | The Triggered Alarms table. Collapse it with the vertical ALARMS handle. |
| Timeline (bottom) | A MASTER row plus one row per camera, with every alarm as a block. |
| Player bar (bottom) | Playback and view controls for the whole screen. |
Header controls
| Control | Purpose |
|---|---|
| Show Detection Boxes | Turns the AI overlay (bounding boxes and labels) on the alarm video on and off. |
| Inference / Custom | Switches between inference alarms (model and analytic alarms) and custom engine alarms. |
| N Jobs Selected | Reopens the job and time-range selection. |
| Clear Selected Jobs | Empties the screen and starts over. |
| View alarm screenshots as slideshow | Opens the slideshow (see below). |
| Start Interactive Tour | Walks you through the screen inside the product. |
| Refresh Alarms | Reloads the alarms of the selected period. |
The Triggered Alarms Table
Every alarm of the selected jobs is listed on the right:
| Column | Content |
|---|---|
| Alarm Name | The alarm that fired ("1 person", "Person in Restricted Area", …). |
| Camera | The camera the alarm was raised on. |
| Device | The device that produced the record. |
| Time | The trigger time. Click the header to sort. |
Use Search alarms or cameras… to filter the list, and click a row to jump to that moment and start playing it.
The Timeline
Each alarm is a block on the timeline.
- The MASTER row combines the alarms of every camera.
- Below it, each camera has its own row with an eye icon (hide the camera) and a LIVE button that jumps back to the live feed.
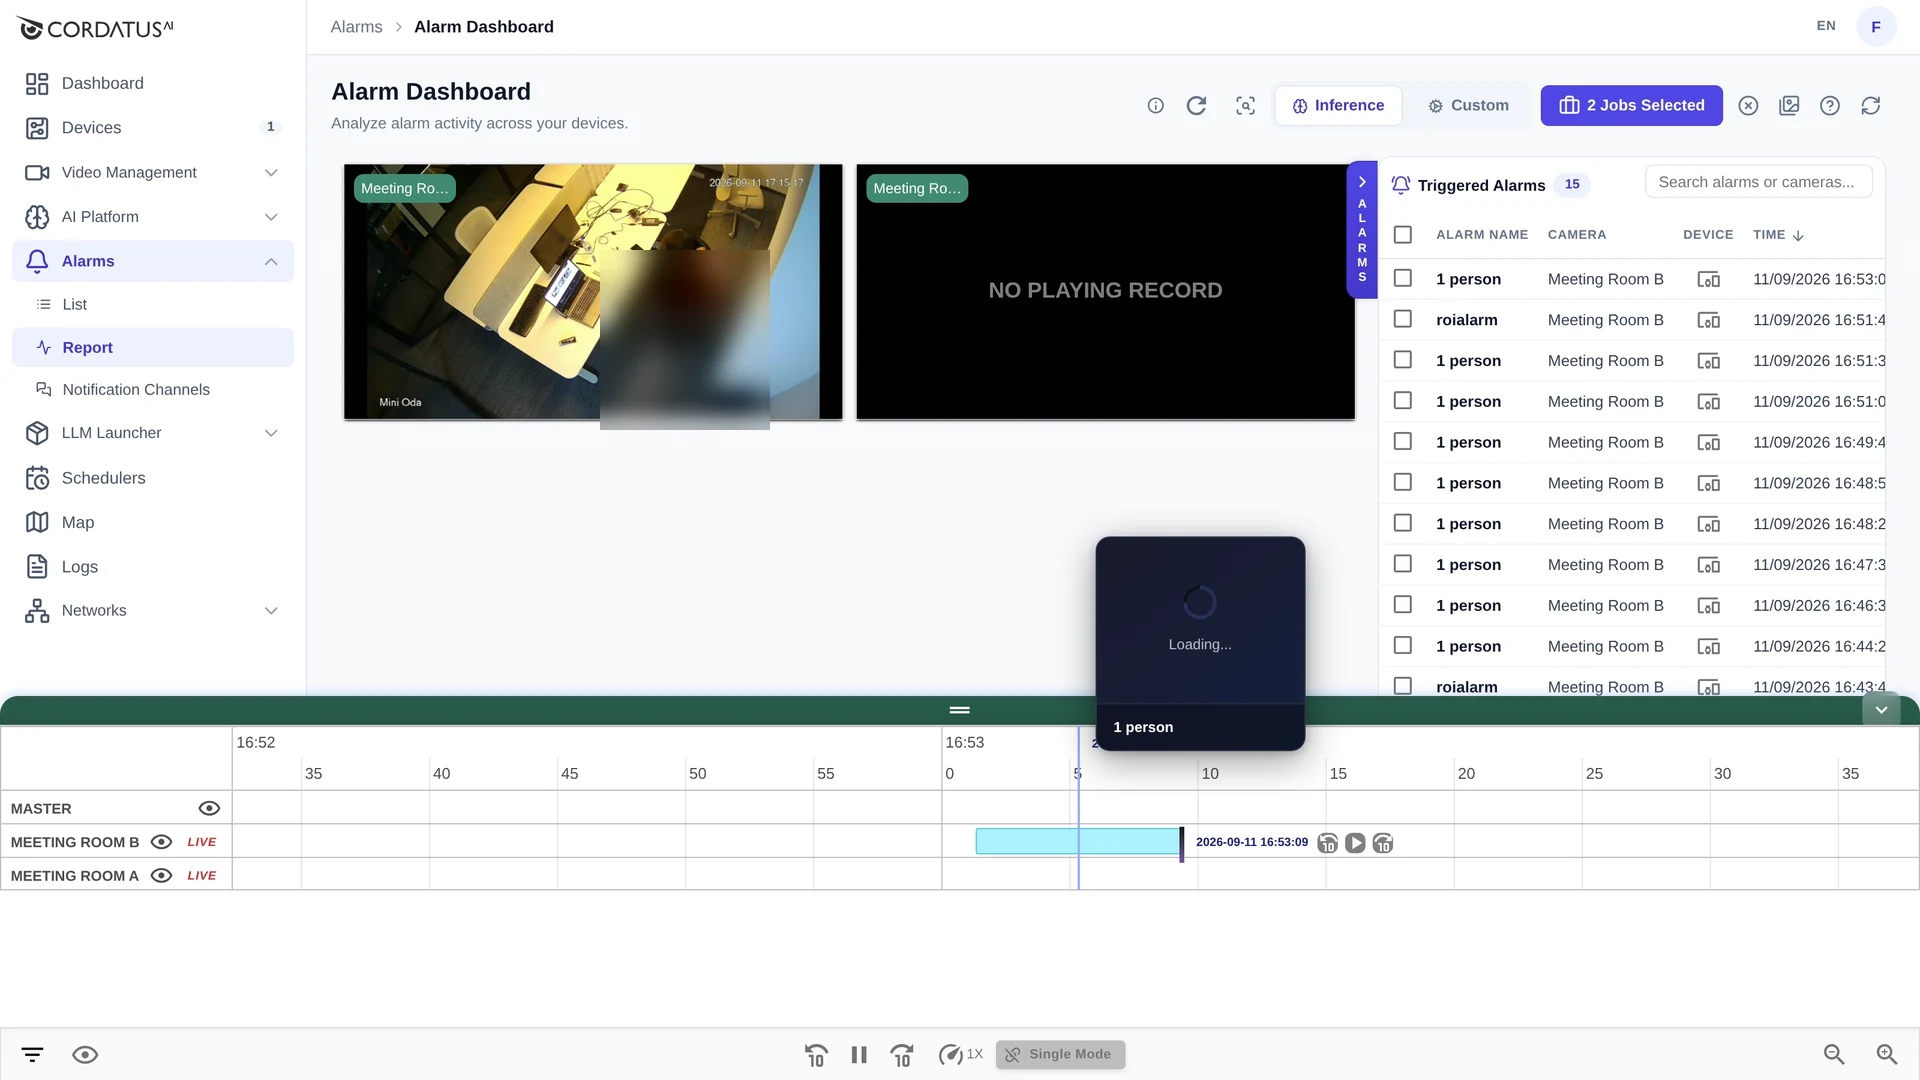
- Hovering a block shows a preview with the alarm name and its screenshot.
- Clicking a block plays that alarm; small previous / play / next buttons appear next to the marker so you can step from alarm to alarm.
- The zoom buttons at the bottom right — or the mouse wheel — change how much time is visible.
- Minimize Timeline collapses the whole panel when you want a bigger video area.
Single Mode and Master Synchronisation
The Single Mode switch in the player bar decides how many cameras follow your clicks:
- Single Mode on — only the camera whose block you clicked plays.
- Single Mode off (master synchronisation) — clicking a block on the MASTER row moves every camera to the same instant, so you can watch one event from several angles at once.
Manual playback controls (play/pause, ±10 seconds) always apply to the camera you are working on.
Slideshow
When you need to scan many alarms quickly, the View alarm screenshots as slideshow button shows the stored screenshots one after another instead of playing video. Use it to triage a busy night in seconds, then switch back to the timeline for the events that matter.
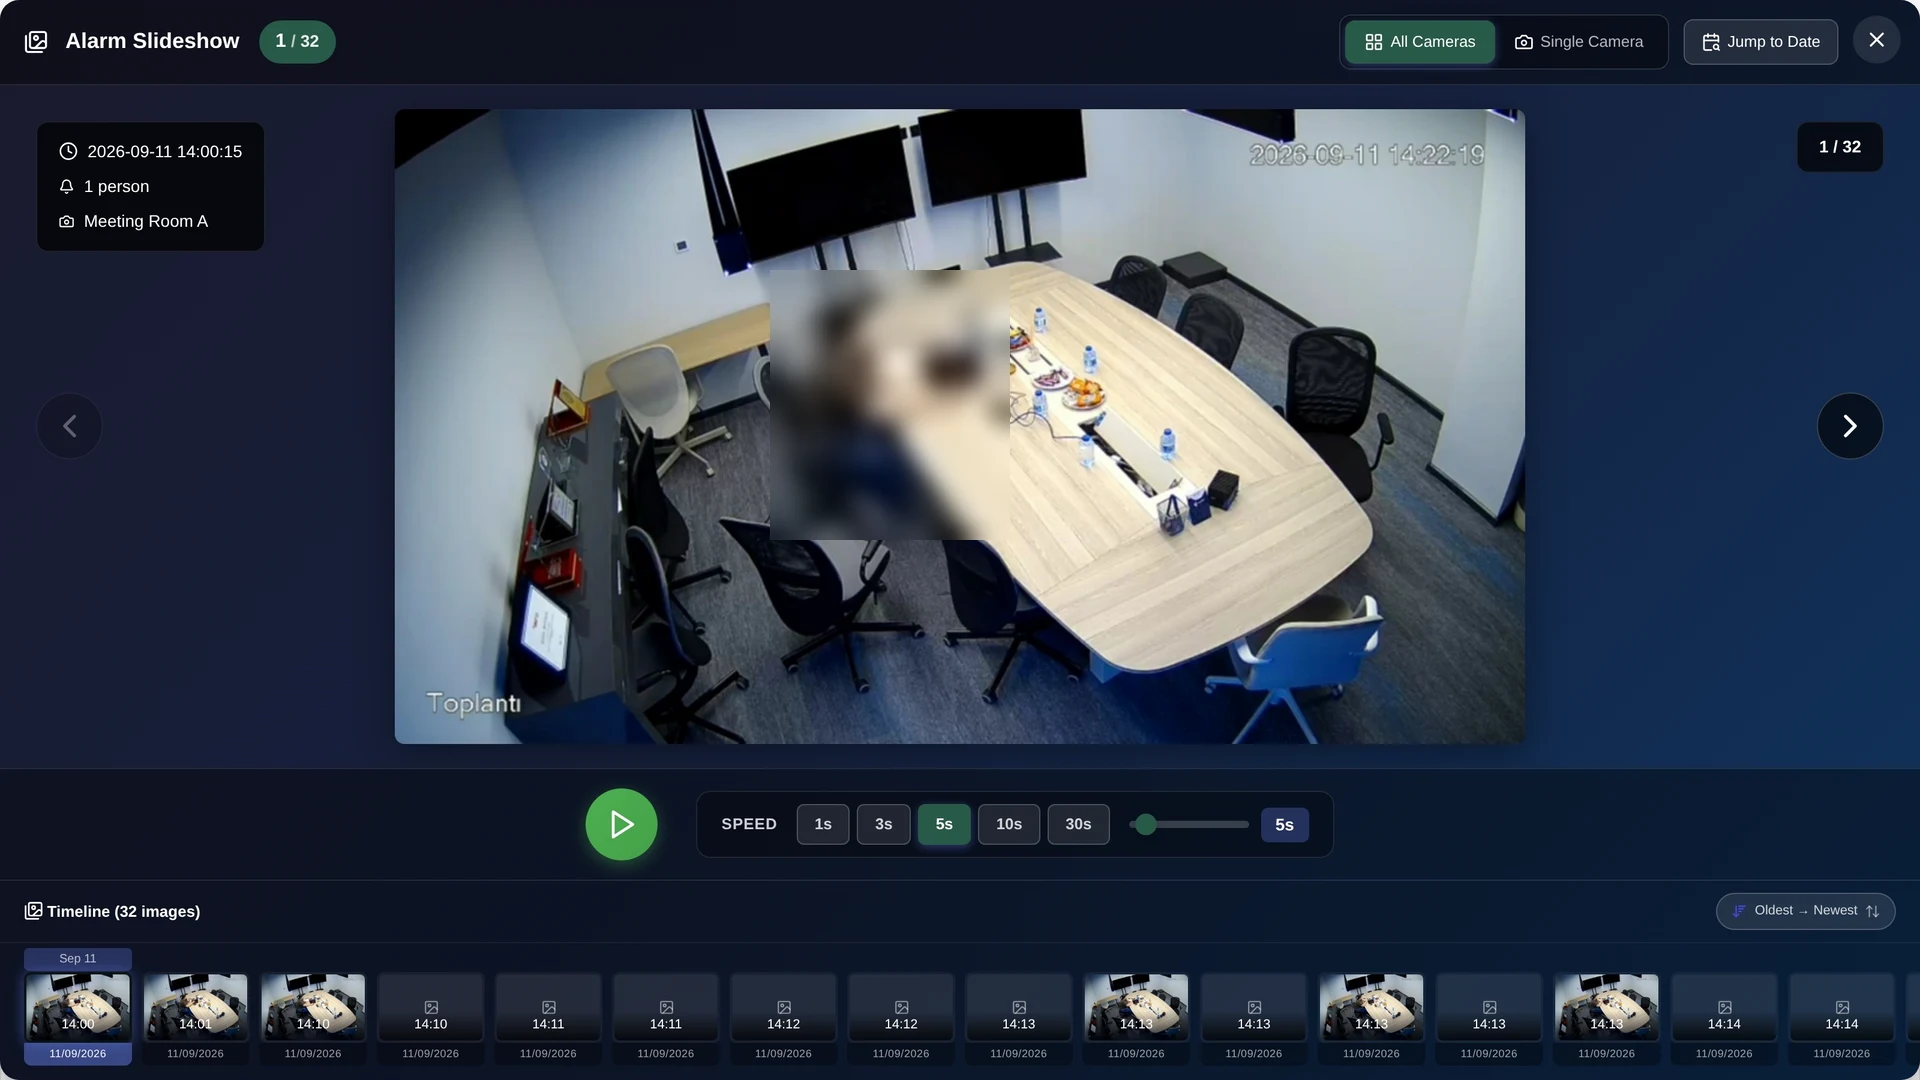
| Control | Purpose |
|---|---|
| All Cameras / Single Camera | Show the alarms of every selected camera, or of one camera only. |
| Jump to Date | Go straight to a specific day. |
| ‹ › | Step to the previous or next alarm screenshot. |
| Play | Advance automatically. |
| Speed | How long each screenshot stays on screen: 1s, 3s, 5s, 10s, 30s — or any value on the slider. |
| Timeline strip | Thumbnails of every screenshot; click one to jump to it. Sort with Oldest → Newest. |
The card in the top-left corner always tells you the time, the alarm name and the camera of the screenshot you are looking at, and the counter shows your position in the set.
Playback Controls
| Control | Action |
|---|---|
| Play / Pause | Starts or stops the current alarm video. |
| −10 s / +10 s | Steps backwards and forwards inside the clip. |
| Speed (1X) | Changes playback speed — slow it down for detailed review, speed it up to scan. |
| Filter | Filters what is displayed on the timeline. |
| Marker text toggle | Hides the labels and buttons drawn on the timeline markers, for a cleaner view. |
Custom Engine Alarms
The Custom tab shows alarms produced by custom engines — your own containers that report events to Cordatus — instead of the built-in inference pipeline. The screen works in exactly the same way: select jobs, pick a time range, then review the events on the timeline.
Tips
- Keep Show Detection Boxes on while investigating: the box tells you what the model reacted to.
- Use the slideshow to triage, then the timeline to investigate.
- Turn Single Mode off when an event was seen by more than one camera.
- Prefer a narrow time range: it loads faster and keeps the timeline readable.
- If an alarm has no video, the device that recorded it may be offline — the screenshot is still available.