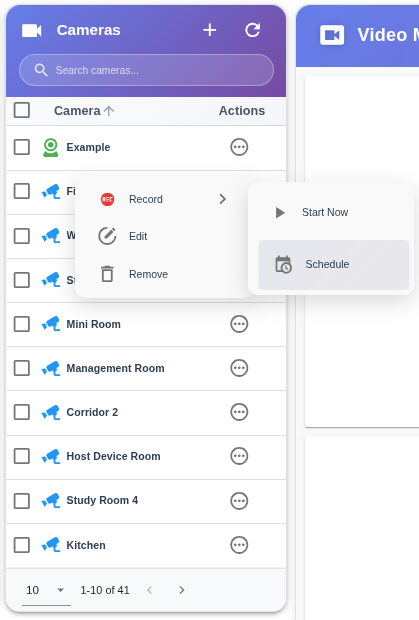
Record Scheduling
The Schedule feature enables users to automate their recording process with ease and precision. Instead of starting and stopping recordings manually, you can define recording schedules directly through customizable calendars. By creating and assigning these calendars to your cameras, you can determine exactly when and how long recordings should take place whether it’s at specific hours of the day, on certain weekdays, or during selected periods of the month.
This flexible scheduling system ensures that all recording tasks are executed automatically according to your defined timelines. You can create multiple calendars for different recording needs, adjust time zones to fit your location, and seamlessly manage recording intervals all from one unified interface.
With the Record Scheduling, your cameras will always be active when you need them to be, ensuring consistent, reliable, and fully automated video capture without any manual effort.
Usage Examples
- Business Hours: Automatic recording Monday-Friday 09:00-18:00
- Night Security: Recording every day 22:00-06:00
- Weekend: All-day recording Saturday-Sunday
- Custom Hours: Recording Tuesday and Thursday 14:00-16:00 + 20:00-22:00
Create Schedule
To start a schedule, click the three-dot menu next to the camera and select the Schedule button.
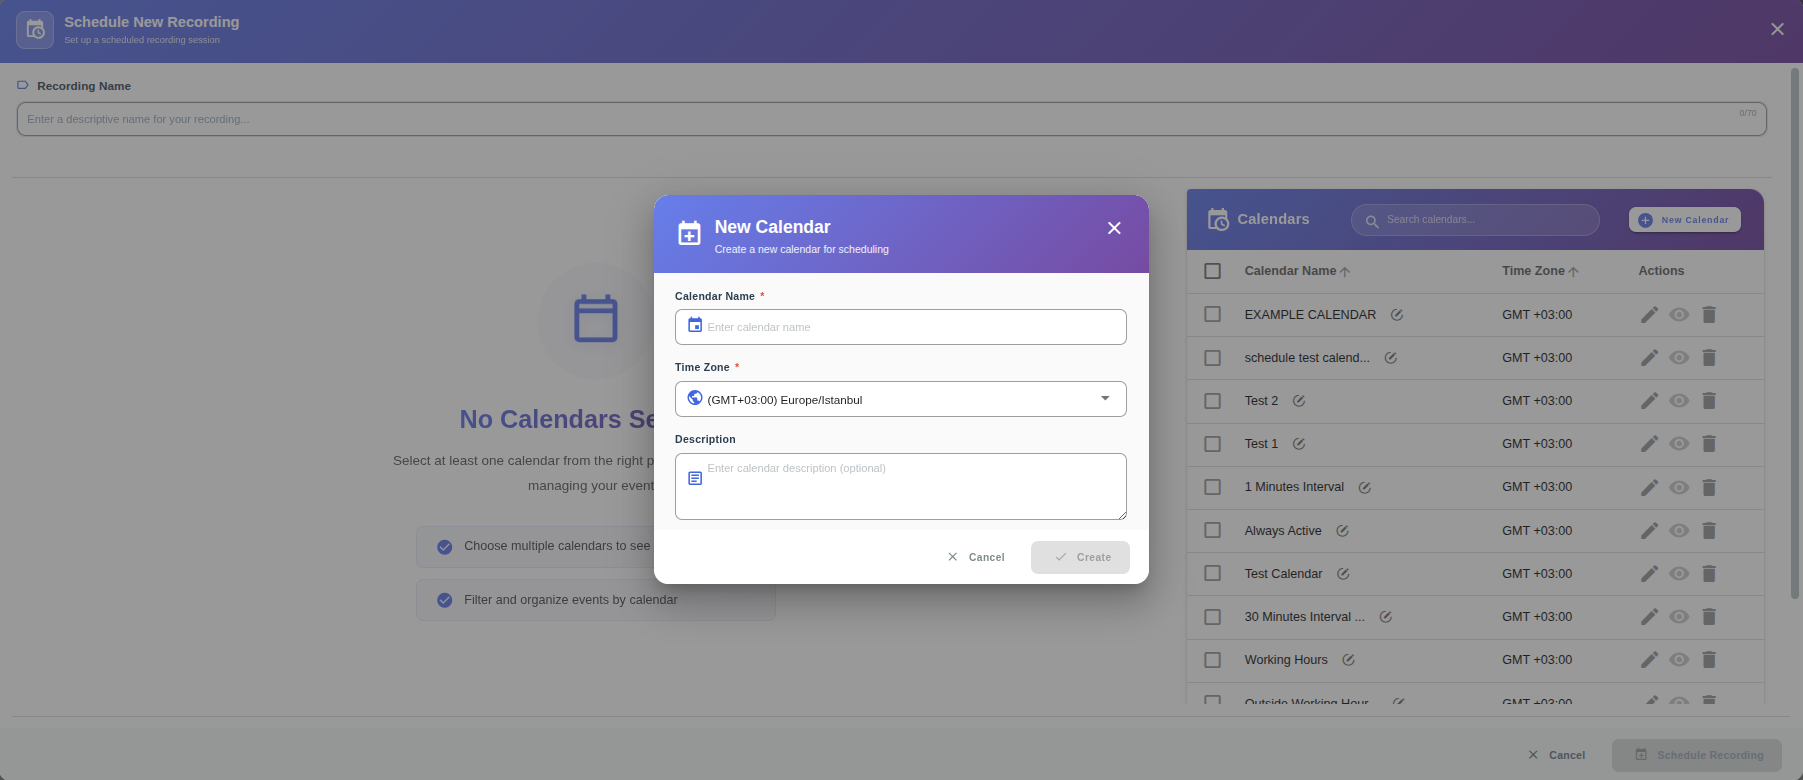
Create Calendar
A calendar in Cordatus acts as a template that defines when recordings should automatically start and stop. Each calendar can include multiple events, representing specific time periods or recurring patterns such as daily, weekly, or monthly recording sessions. Once created, you can assign this calendar to one or more cameras, ensuring they record only during the defined time ranges. By using calendars, you gain complete automation over your recording schedules without needing to start or stop recordings manually.
Next, create the calendar where the schedule will be applied.
To do this, click the “+ Calendar” button, enter a name for the calendar, select the time zone, and optionally add a description, then click Save.
Add Event
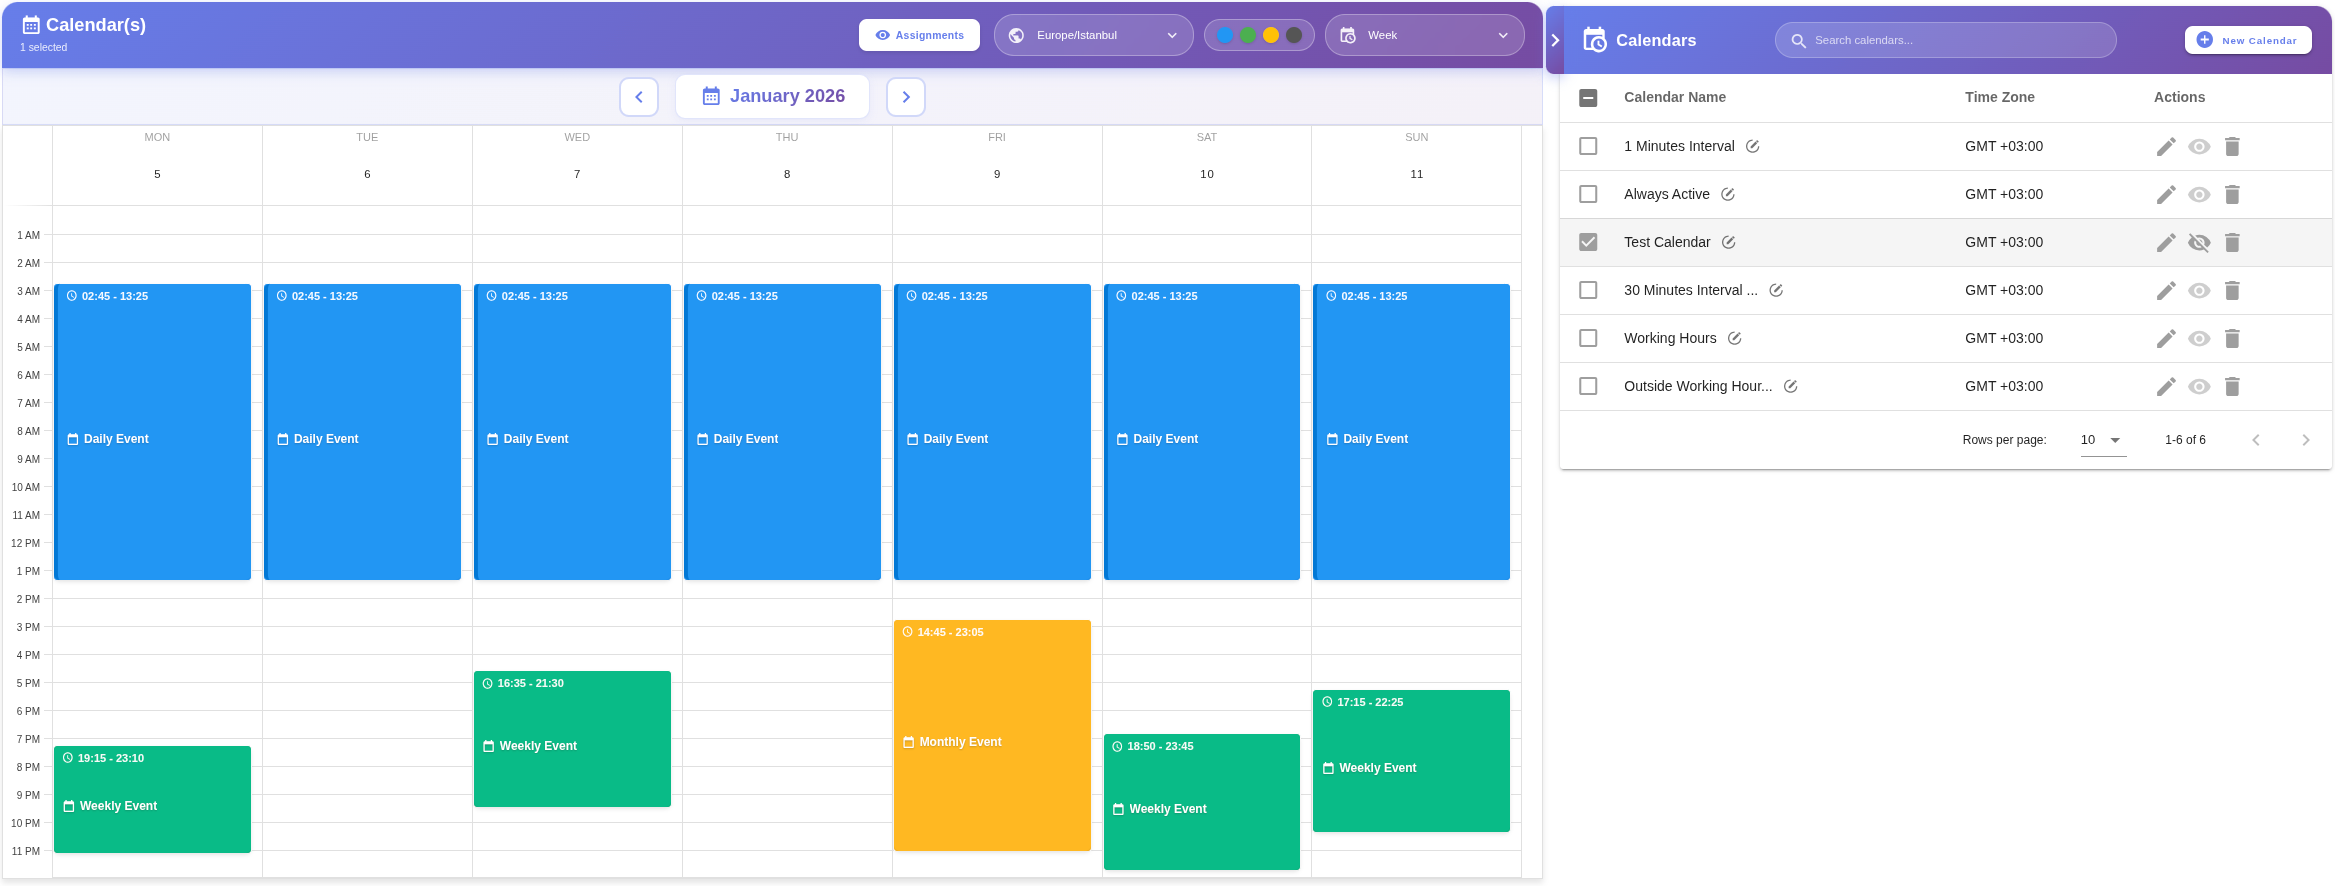
When you open the Calendar page, you first need to enable Edit Mode. To do this, click the pencil icon as shown below once activated, you’ll notice that the “+ Event” button becomes available.
Next to the pencil icon, you’ll find an eye icon, which allows you to show or hide the calendar view. The trash bin icon is used to delete the current calendar, and if you wish to create a new one, simply click the “+ Calendar” button. If you want to divide the calendar view by months, weeks, or days , you can change the View Type from the top-right corner of the page.
When you click the “+ Event” button, a new window will appear. In this window, you can enter the event name and specify whether it will be a Recurring event or a One-Time event.
Recurring Events
If you select Recurring, you will need to choose a Recurrence Type from the following options:
-
Daily
A one-day calendar view appears.
You can use drag and drop to select your preferred time ranges directly on the calendar, or click on a specific time slot to open the event editor and set the start and end hours manually. -
Weekly
A one-week calendar view appears.
You can drag and drop to assign the event to specific days and time ranges throughout the week, or click on the calendar to manually define the start day/time and end day/time.warningNote: If the start time is set after the end time, the calendar will automatically fill the days in reverse order.
Example: If the start is Friday 13:54 and the end is Tuesday 15:51, the active period will cover Friday through Tuesday inclusively. -
Monthly
A four-week calendar view appears.
You can navigate through the weeks using the forward and backward buttons.
Use drag and drop to select your preferred days and time ranges, or click to open the event editor and set the start and end times manually.warningNote: If the start date/time is after the end date/time, the system fills the schedule in reverse order.
Example: Starting on the 17th at 13:54 and ending on the 2nd at 15:51 will result in an active period from the 17th through the 2nd of the following month.
Additional Settings
- Interval: Defines how often the event repeats, depending on the recurrence type.
(Example: If recurrence type is “Daily” and interval = 3, the event repeats every 3 days. If interval = 1, it repeats every day.) - Start Date: The date when the event should begin.
- End Date: The date when the event should stop.
If left blank, the event will repeat indefinitely.

After setting the Event Name, Recurring, and Interval options, you can either click on an empty area of the calendar to manually enter the desired time range, or use the arrow-marked sections to click and drag up or down with your mouse to select the time period visually.
Once you’ve made your fine adjustments in the modal window that appears on the left, click Save to confirm and apply your changes.
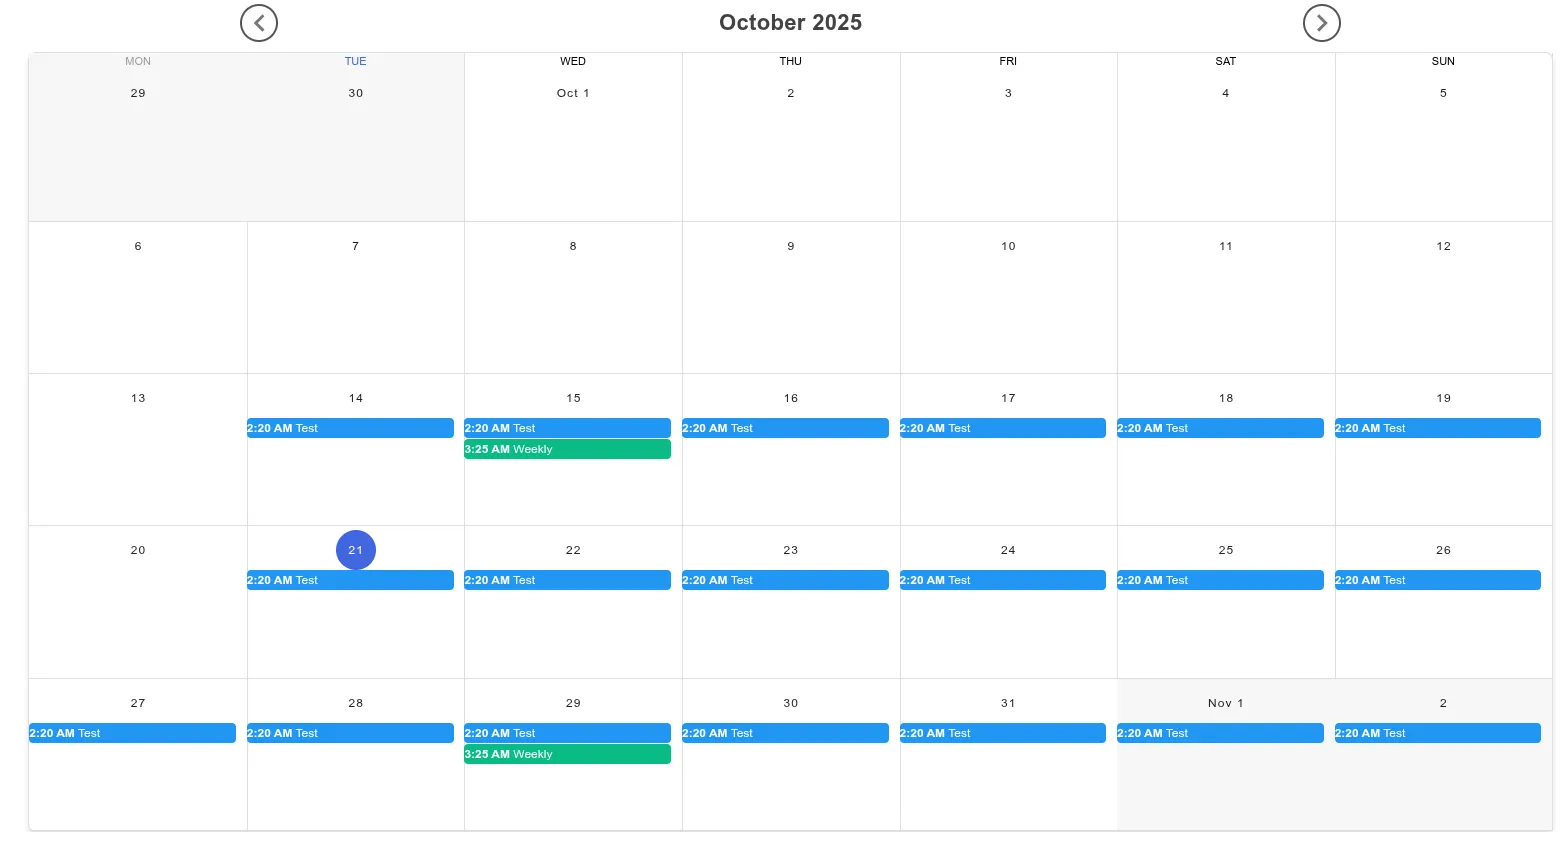
To view the calendar in a monthly layout, select Month from the top-right corner.
Since we set the Interval to 2, the recording will occur every two weeks.
You can also verify this directly from the calendar view.
Below the View Type selector, you’ll notice a set of colored indicators.
These colors represent the type of events displayed on the calendar:
- 🔵 Blue — Daily Events
- 🟢 Green — Weekly Events
- 🟡 Yellow — Monthly Events
- ⚫ Black — One-Time Events
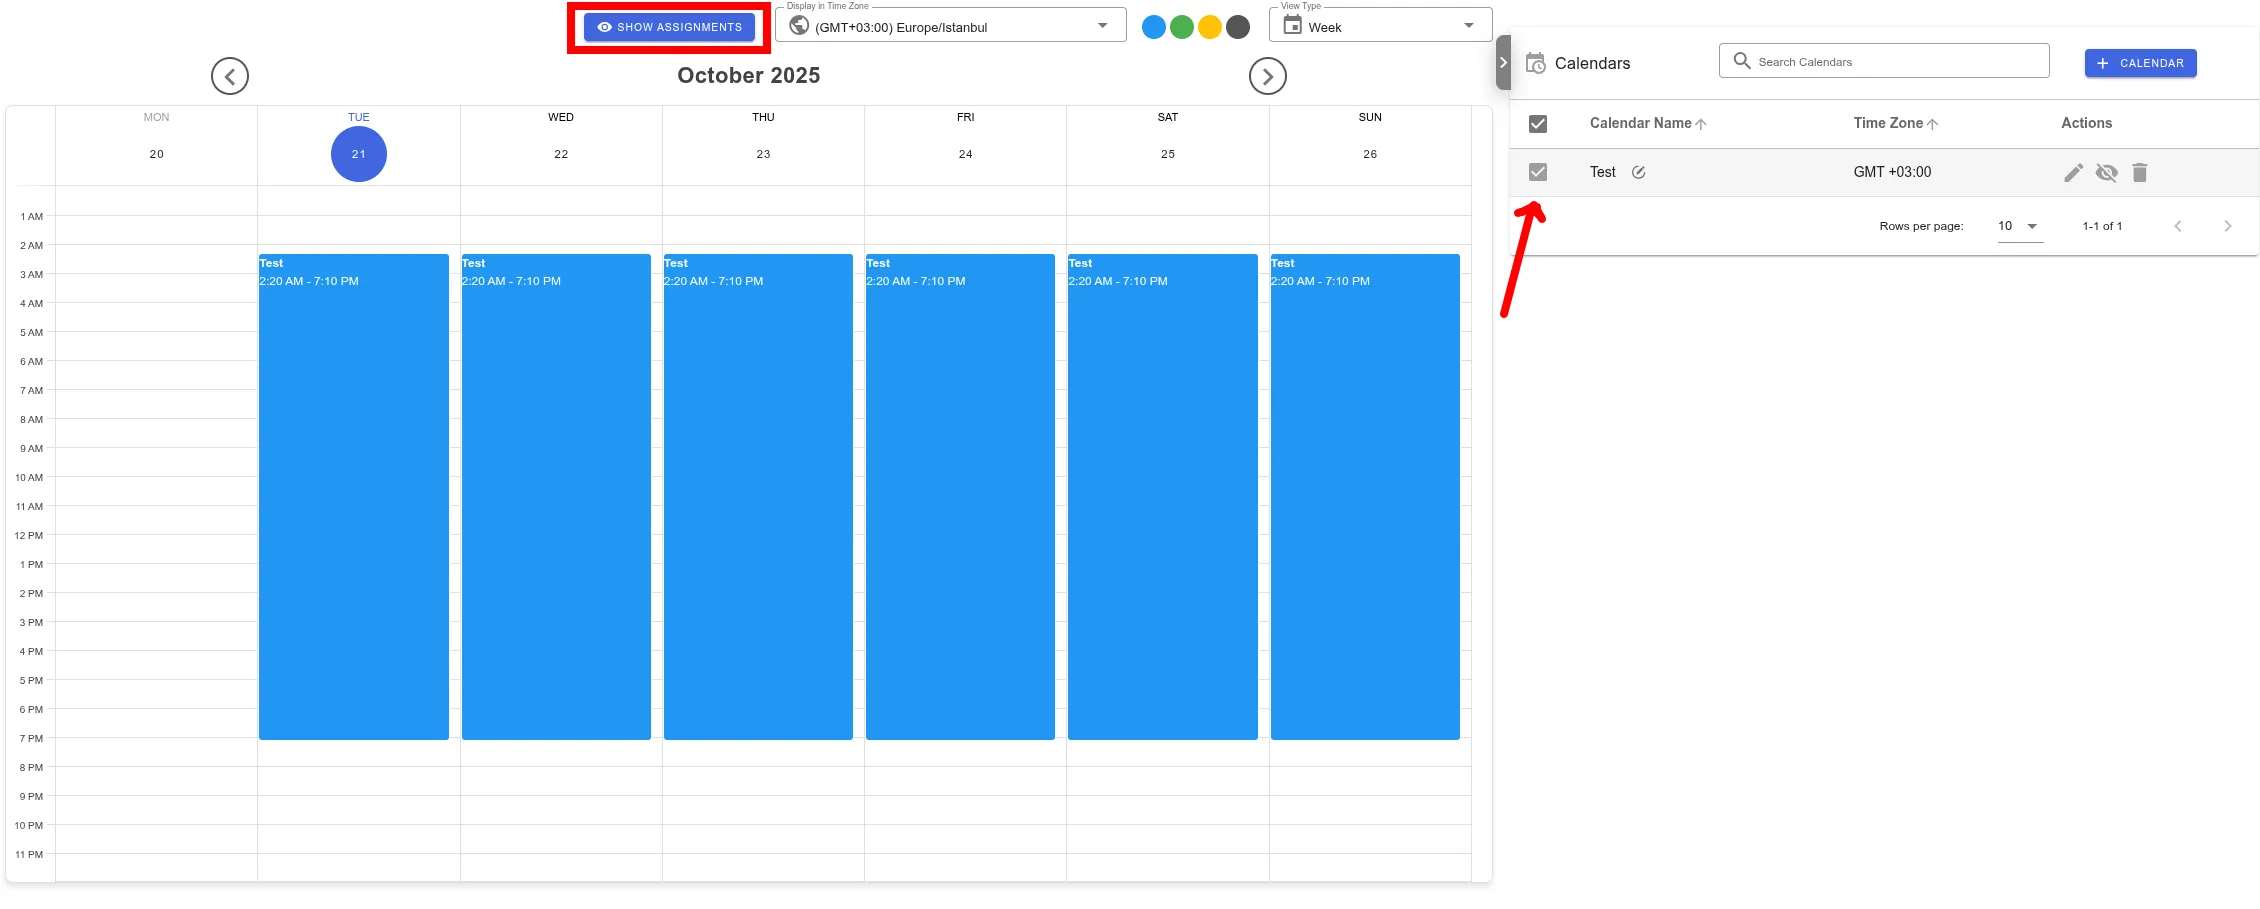
Your calendars will be listed on the right side of the page. Select any calendar you wish, then click the Show Assignment icon to view the recordings assigned to that calendar on the Recordings page.

What happens after the schedule is created?
After creating the schedule, the recording tasks will appear as “Scheduled” in the record list. When the configured time arrives, their status will change to “Schedule Starting”, and then to “Running”, indicating that the recording process has begun.

The scheduling process is managed by Cossa (Cordatus Smart Scheduling Agent), which checks all schedule operations every minute.
Therefore, if you create a calendar that includes the current time range, the recording may not start immediately upon creation.
In such cases, you need to wait until the next minute cycle for it to begin.
Example:
If you start a schedule at 14:30:35 and the record does not switch to the Running state, please wait until 14:31:00.
Calendar Operation Logic
- The system automatically starts and stops recording based on the assigned calendar
- Multiple calendars can be assigned to a recording
- Calendars operate independently of each other
- When a calendar is edited, all recordings using that calendar are automatically updated
Calendar Management
- You can edit created calendars from the Settings > Calendars section
- When a calendar is deleted, recordings using that calendar revert to normal recording
- Calendars can be temporarily disabled
Finally, you can go to the Watch tab on the Records page to view the videos recorded by your camera.